

Everything You Need to Know About Date in JavaScript
Jul 05, 2019
In this part, we’ll add some basic SEO information for our blog then adding some configurations to Netlify service so that our blog can work correctly when deploy to production. Finally, we’ll add a custom domain (namecheap) for our blog.
First, we’ll create some basic blog information in gatsby-config.js:
// previous code

module.exports = {
  siteMetadata: {
    title: `Mr Leo`,
    author: `Mr Leo`,
    description: `Mr Leo blog and portfolio`,
    siteUrl: `https://www.mrleo.dev`,
  },
  plugins: [
    // configurations
  ],
}It is a React component will manage all of your changes to the document head.
yarn add react-helmet gatsby-plugin-react-helmet
yarn add -D @types/react-helmet
Add gatsby-plugin-react-helmet to gatsby-config.js as well:
// previous code

module.exports = {
  // previous code
  plugins: [
    // previous configurations
    `gatsby-plugin-react-helmet`,
  ],
}Next, create a SEO component inside src/components/:
/**
* SEO component that queries for data with
* Gatsby's useStaticQuery React hook
*
* See: https://www.gatsbyjs.org/docs/use-static-query/
*/
import React from 'react'
import Helmet from 'react-helmet'
import { useStaticQuery, graphql } from 'gatsby'
interface IProps {
title: string
description?: string
lang?: any
meta?: any
}
const SEO = (props: IProps) => {
const { description = ``, lang = `en`, meta = [], title } = props
const { site } = useStaticQuery(
graphql`
query {
site {
siteMetadata {
title
description
author
}
}
}
`
)
const metaDescription = description || site.siteMetadata.description
return (
<Helmet
htmlAttributes={{
lang,
}}
title={title}
titleTemplate={`%s | ${site.siteMetadata.title}`}
meta={[
{
name: `description`,
content: metaDescription,
},
{
property: `og:title`,
content: title,
},
{
property: `og:description`,
content: metaDescription,
},
{
property: `og:type`,
content: `website`,
},
{
name: `twitter:card`,
content: `summary`,
},
{
name: `twitter:creator`,
content: site.siteMetadata.author,
},
{
name: `twitter:title`,
content: title,
},
{
name: `twitter:description`,
content: metaDescription,
},
].concat(meta)}
/>
)
}
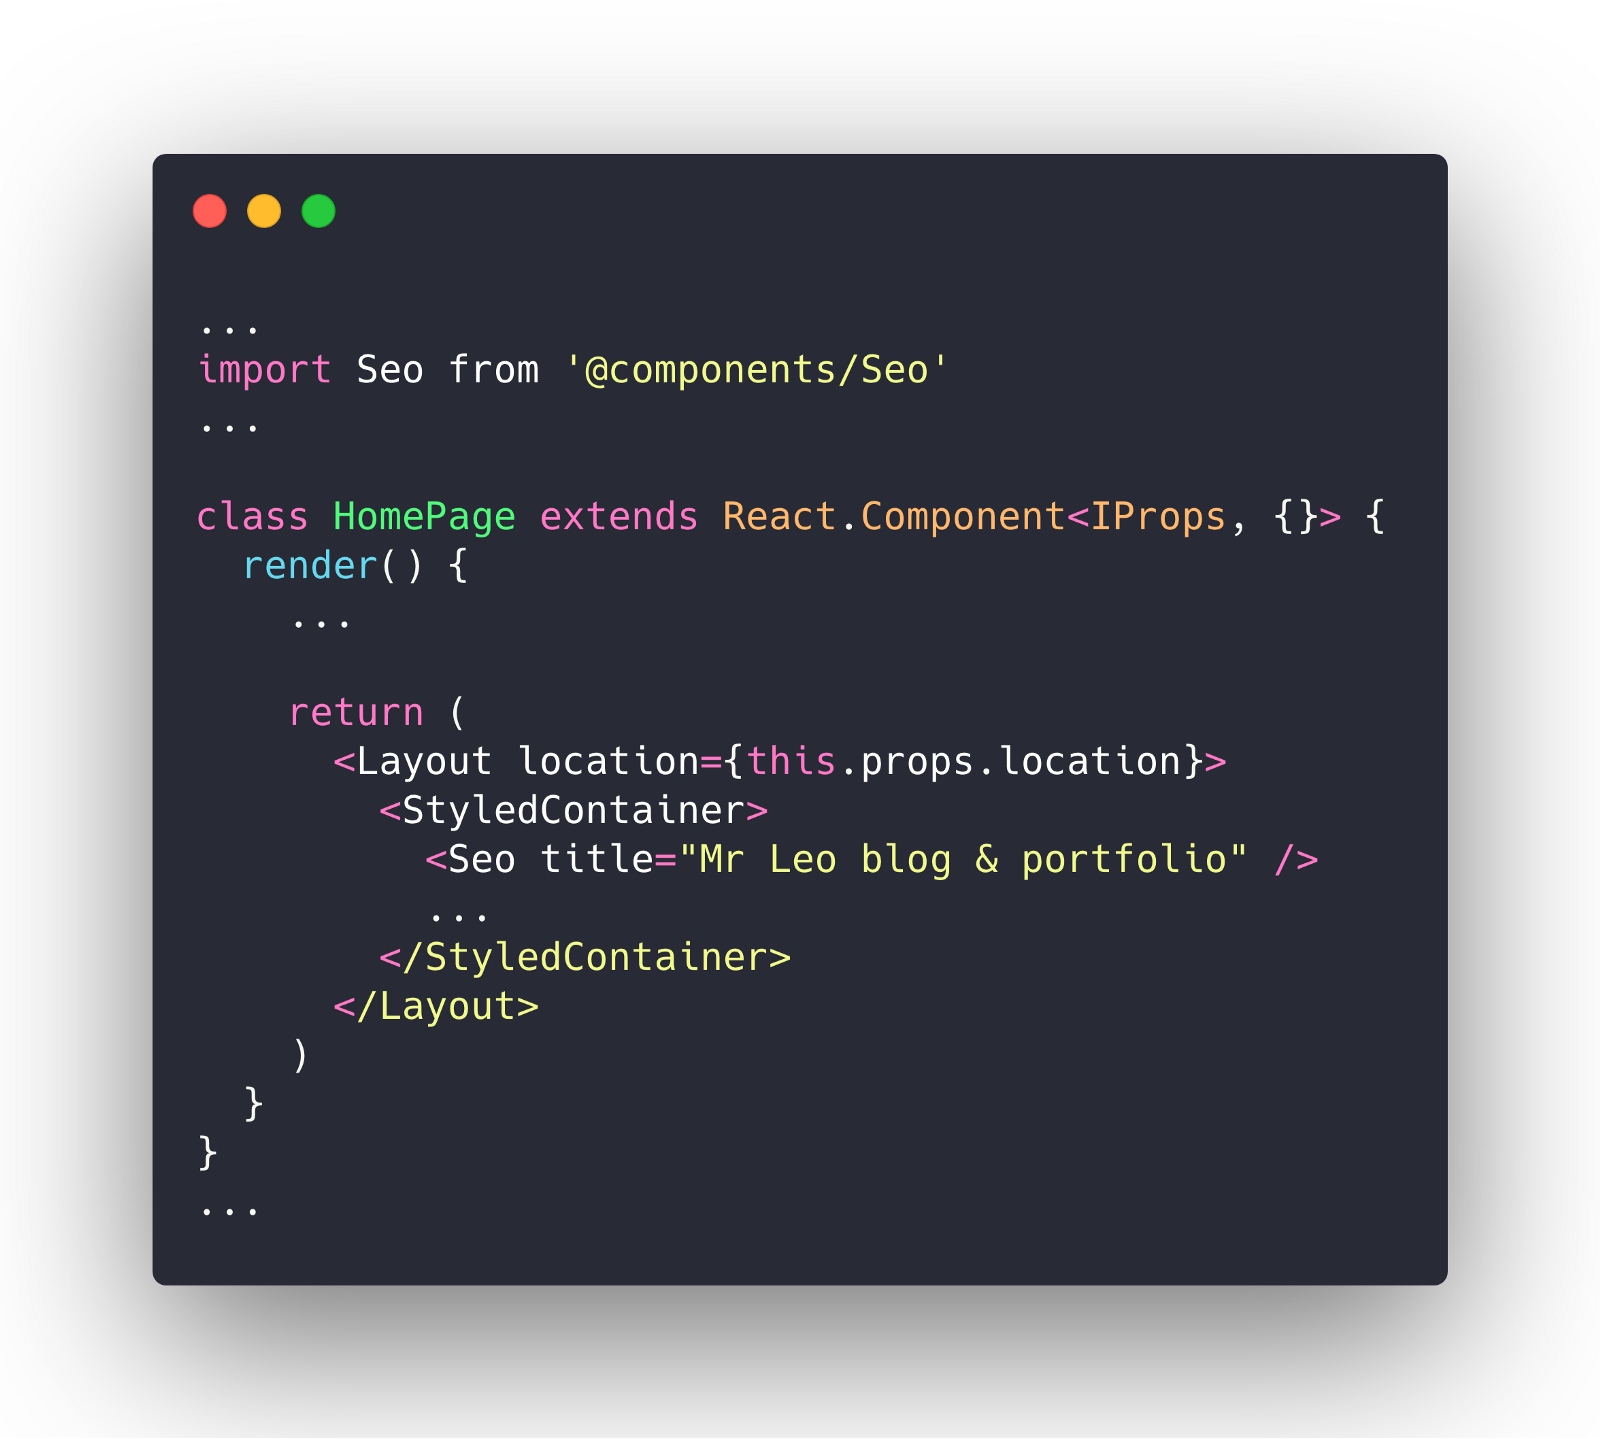
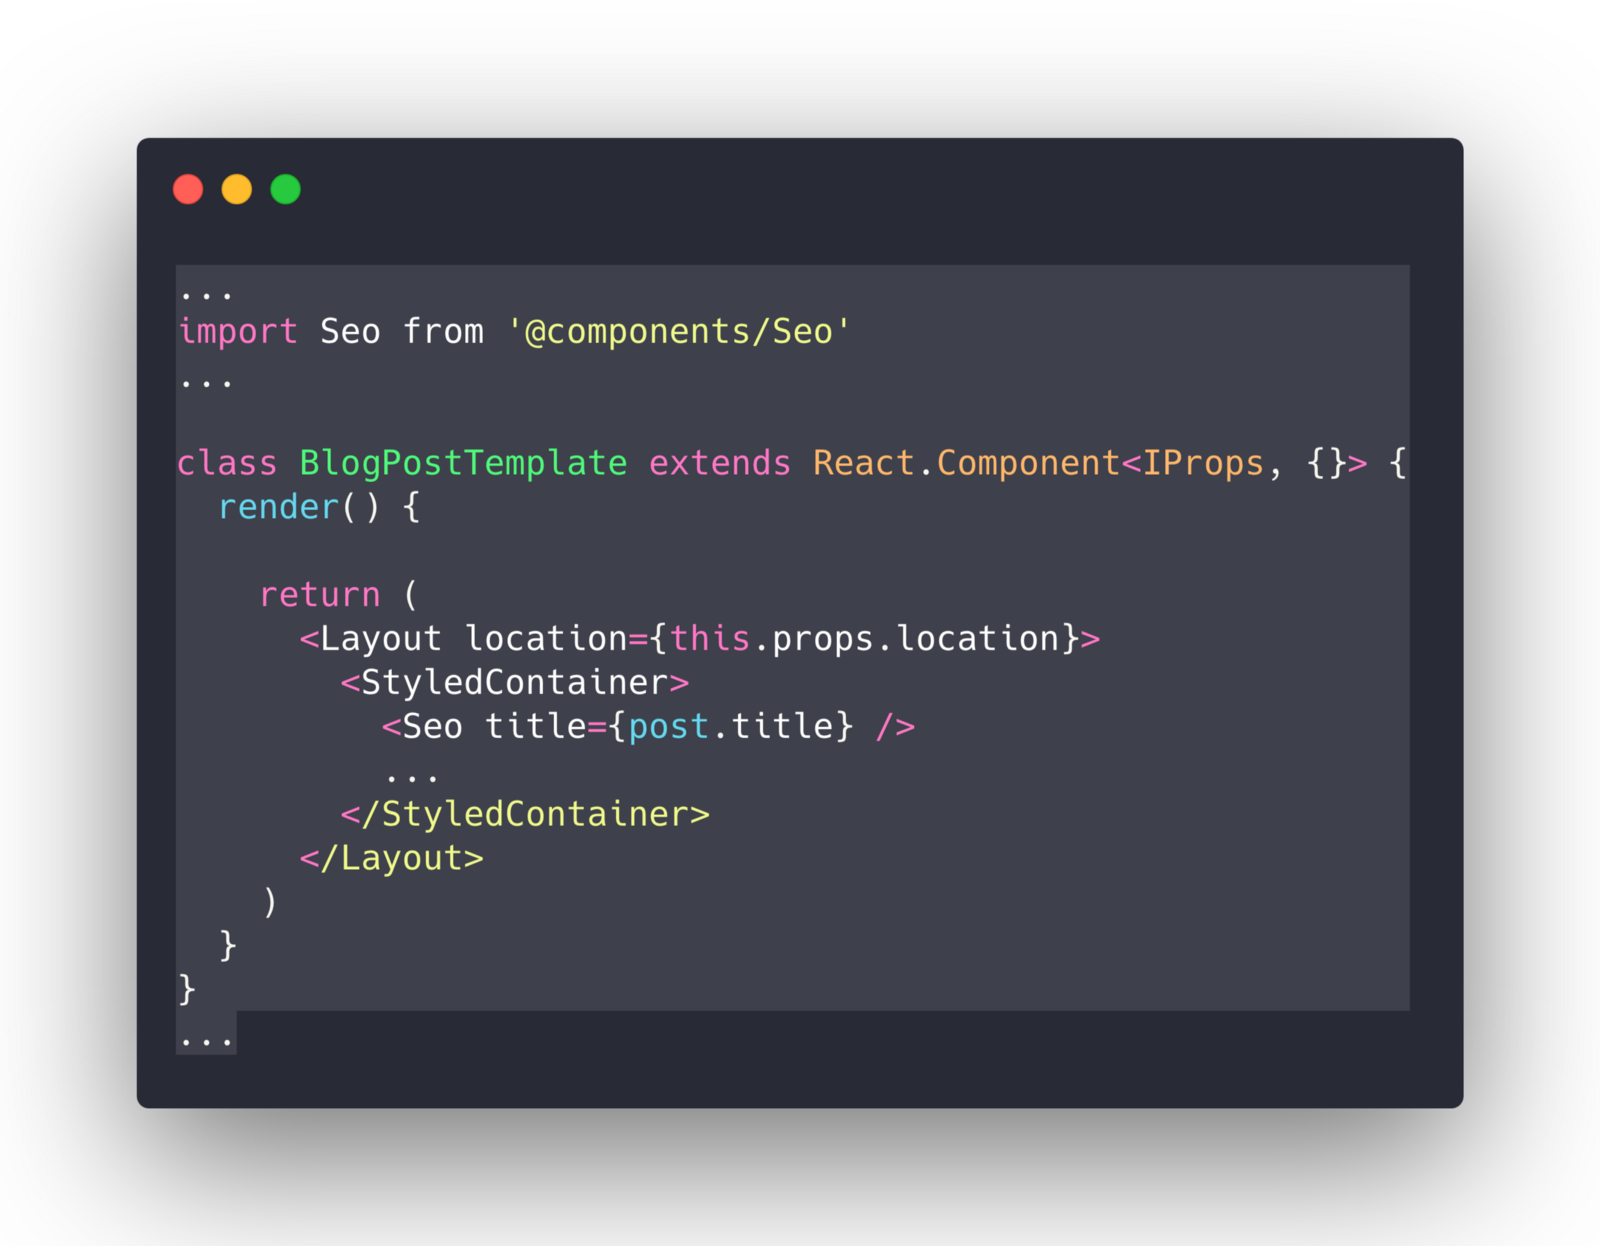
export default SEOInject Seo component into home page and blog template:
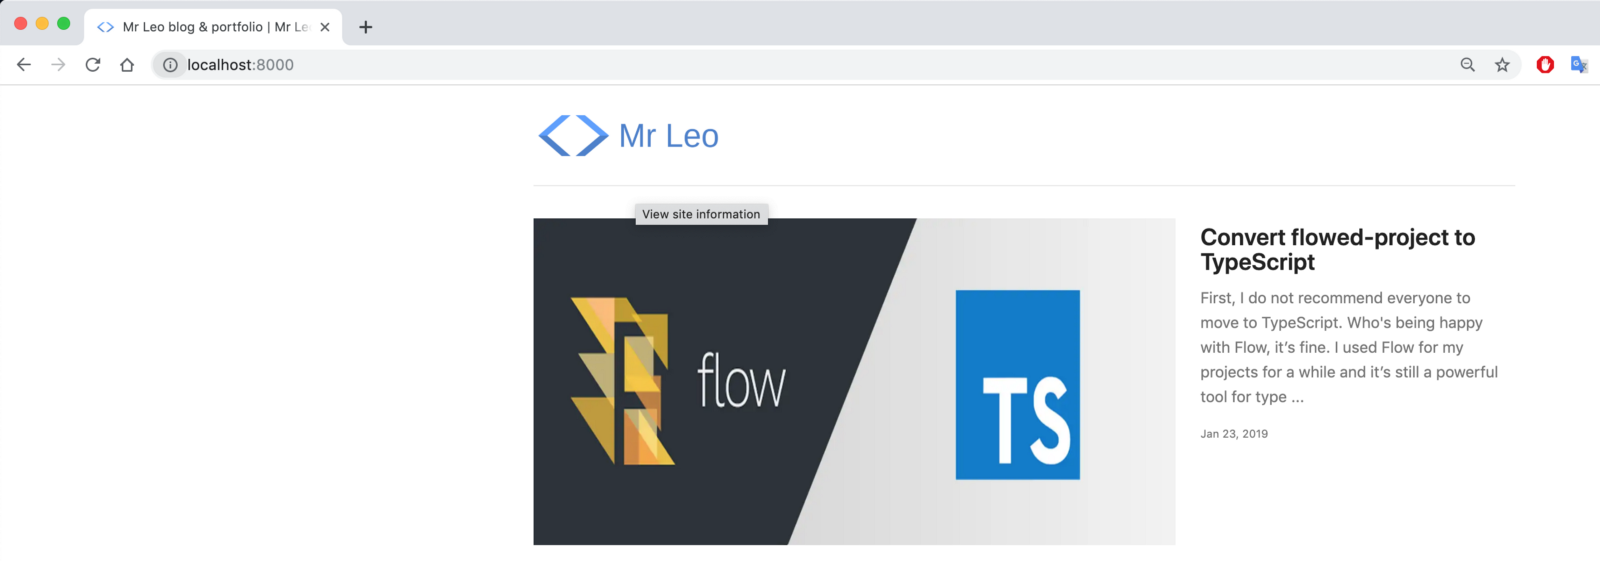
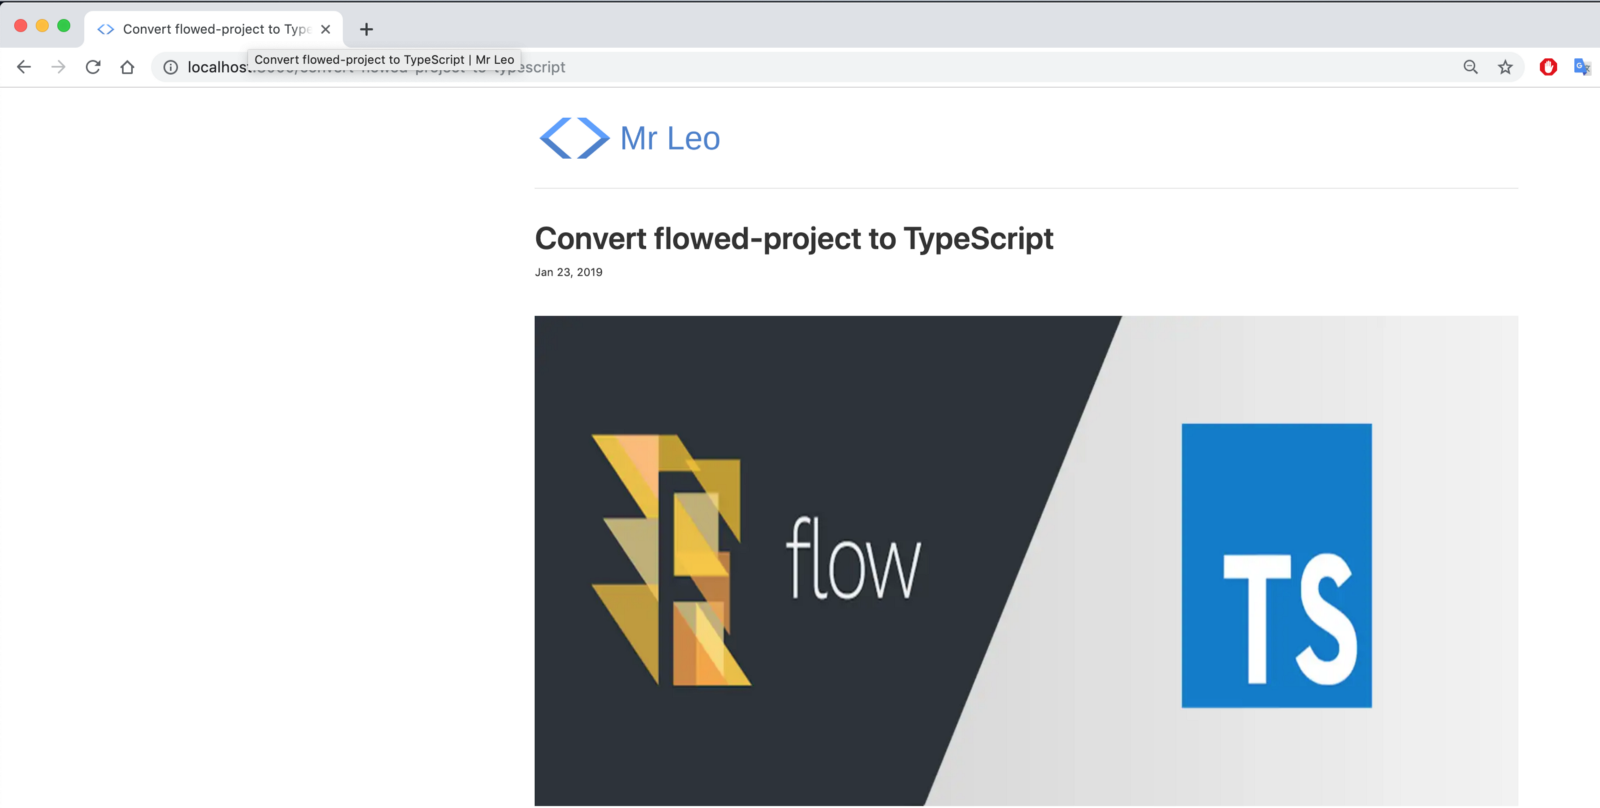
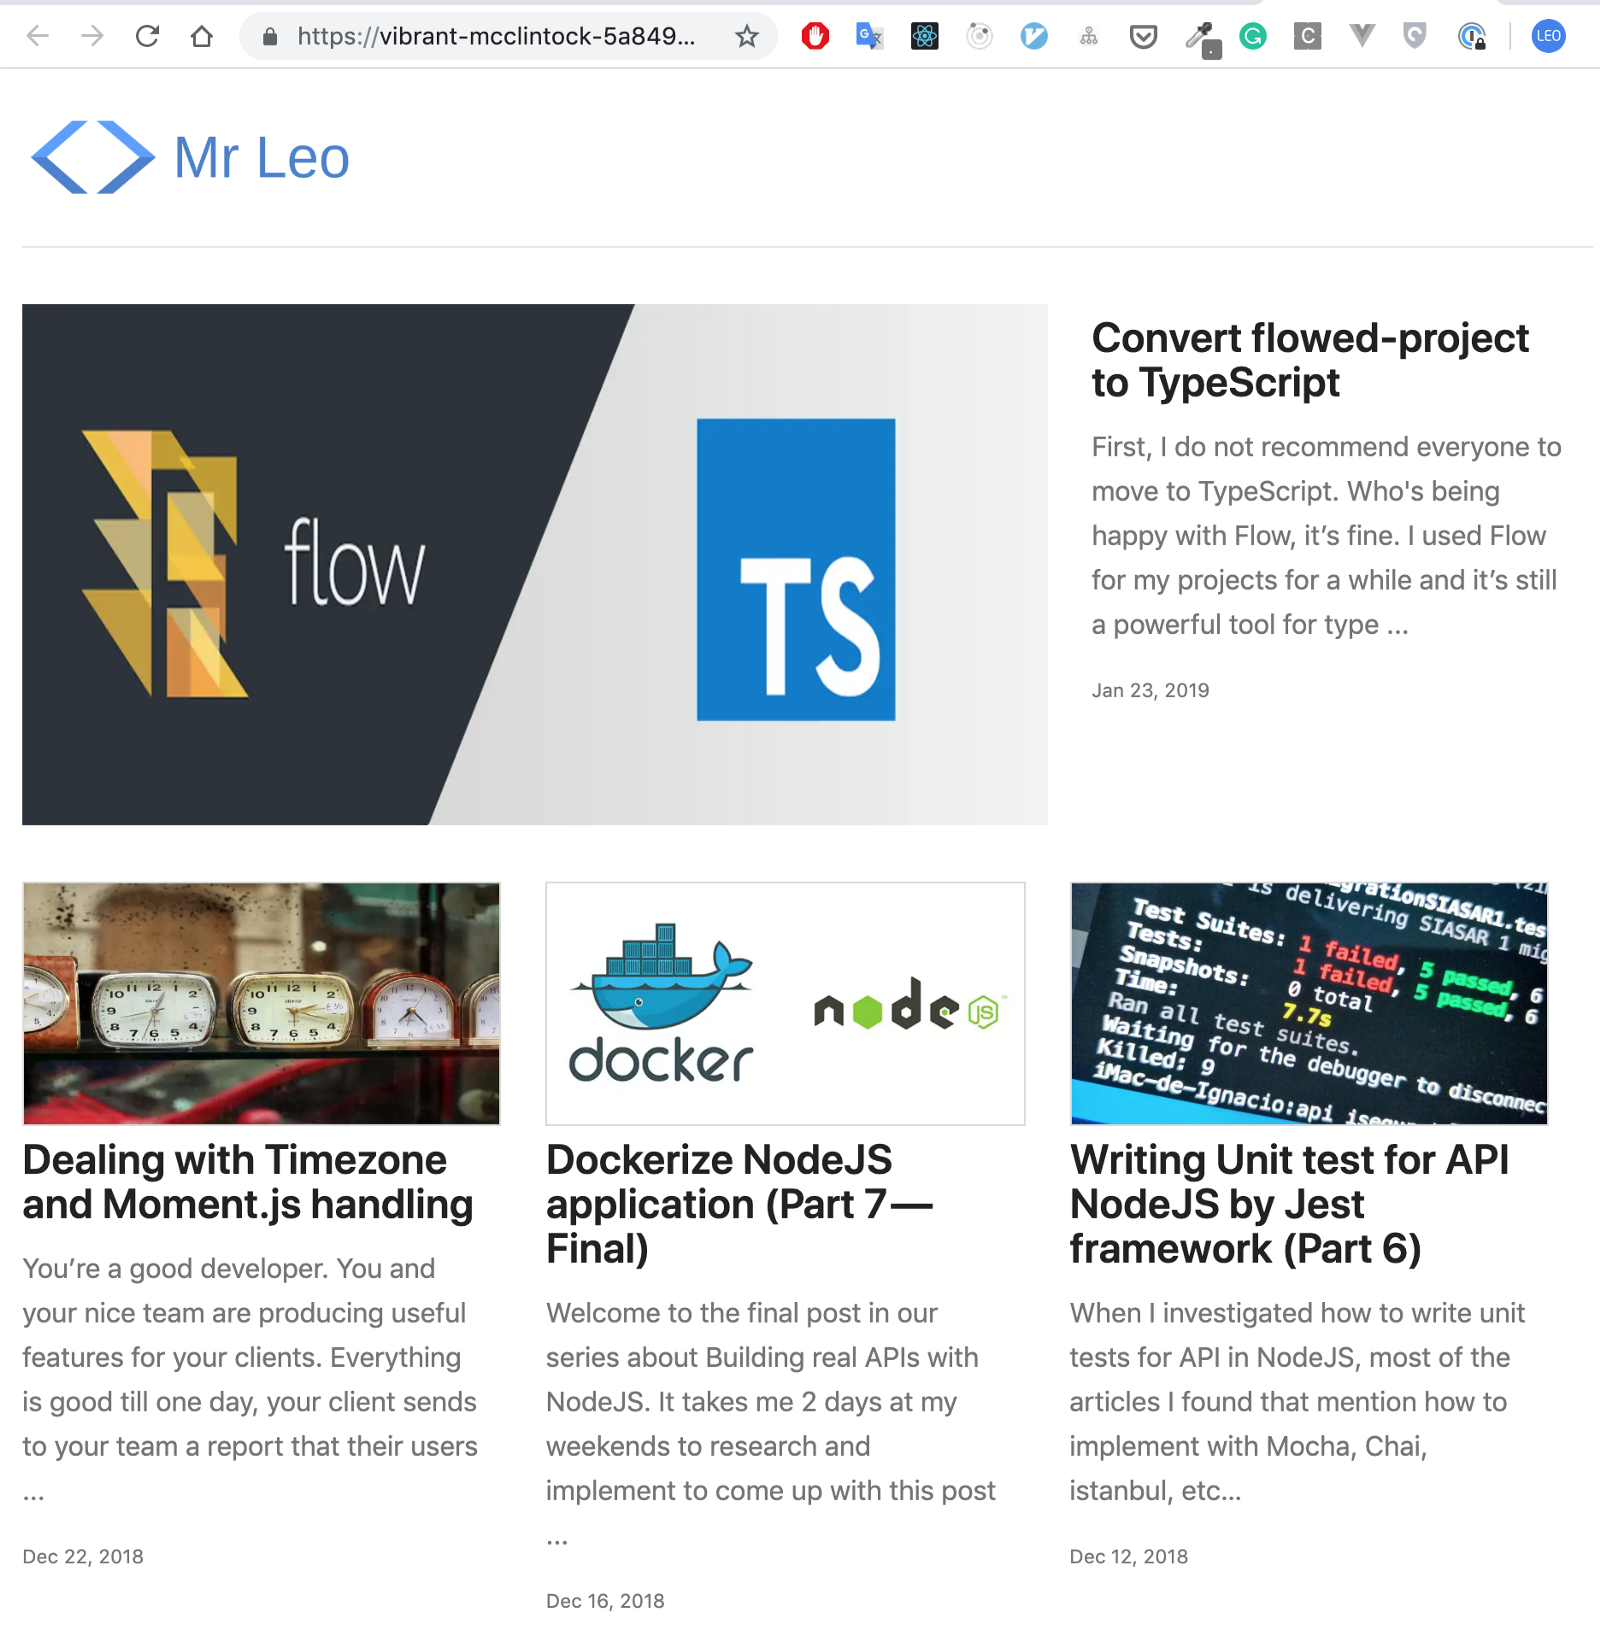
Now you’ll see the nice titles for home page and each post:
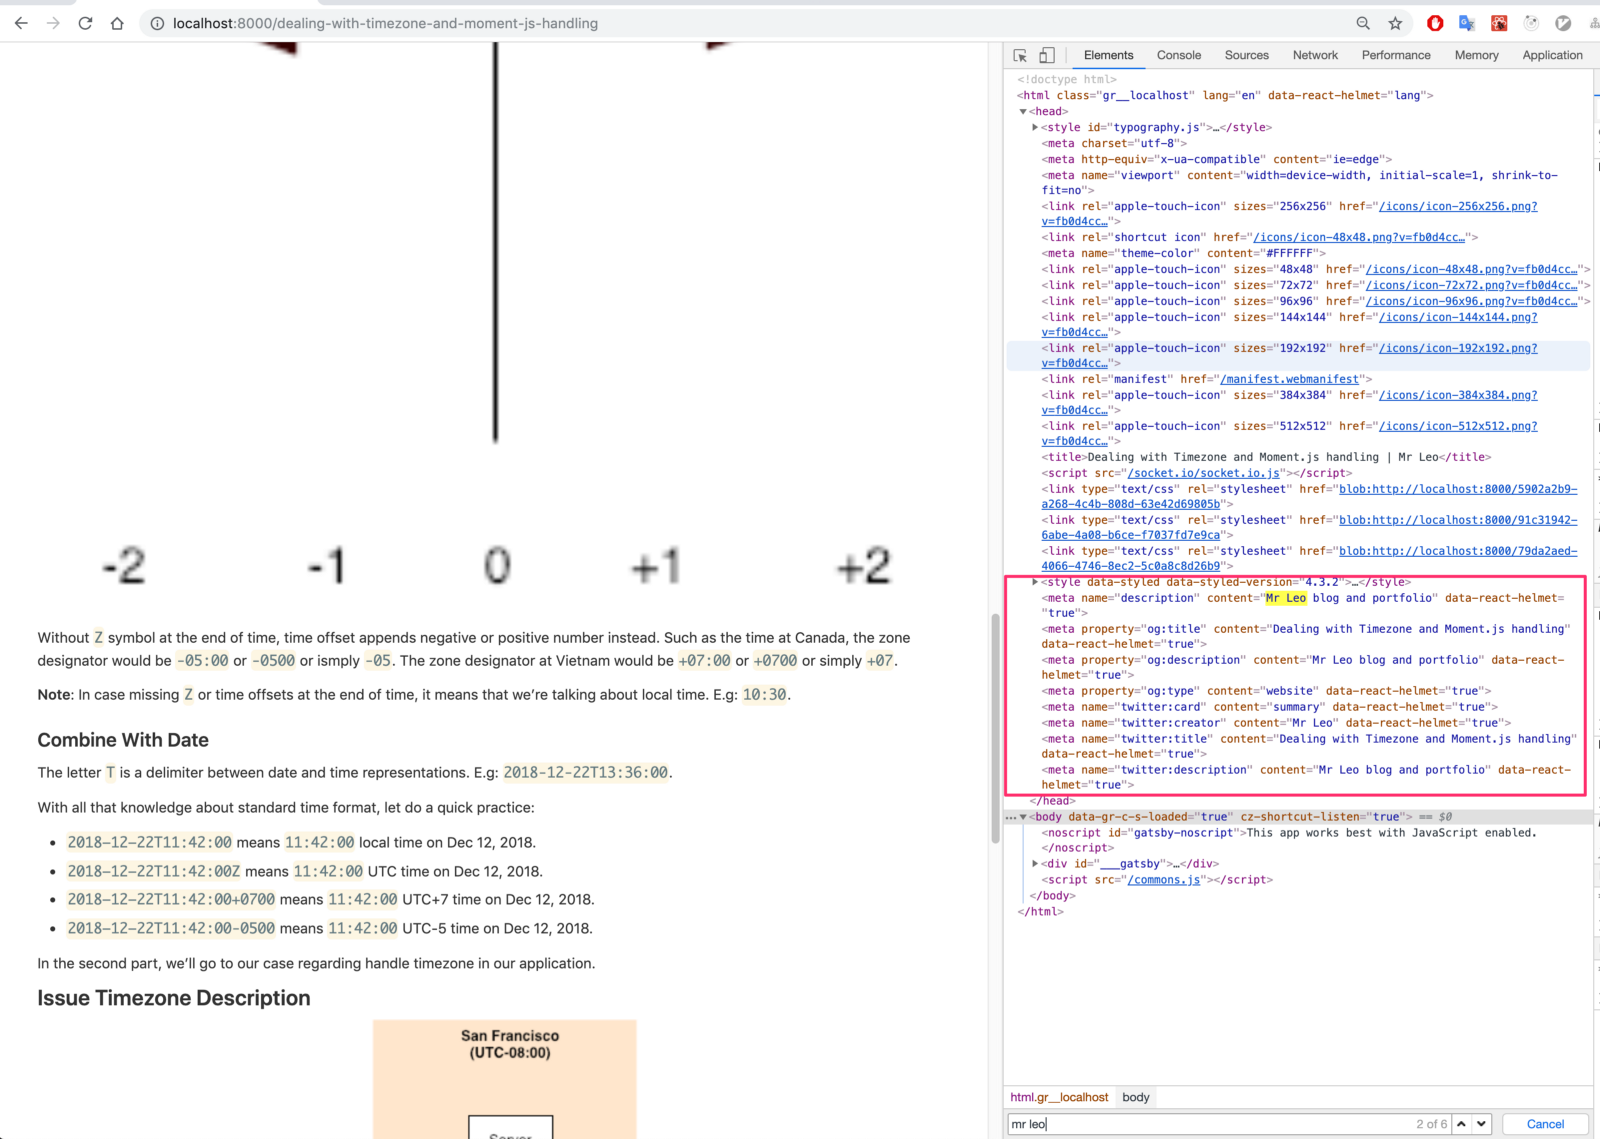
Try to inspect DOM we can see seo information in our header as well:
We have done a lot of work. Time to add deployment APIs to netlify so that our blog can go live successfully.
Go to Settings in app.netlify.com dashboard:
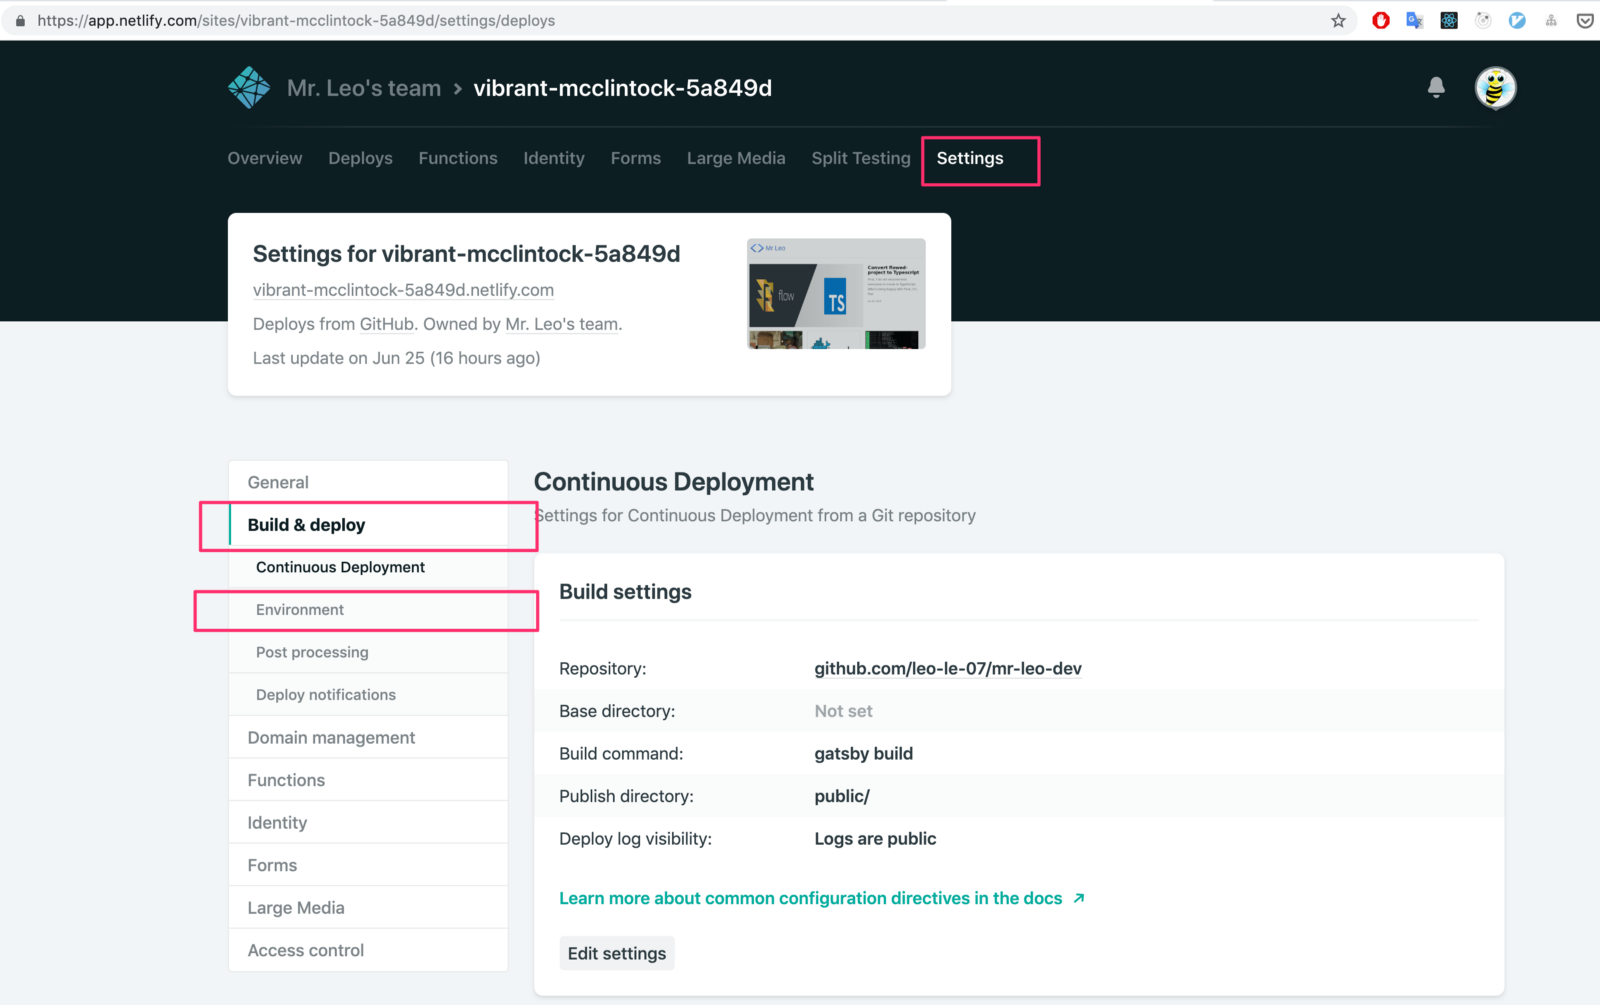
Select Environment under Build & deploy menu. Click on Edit variables to add new:
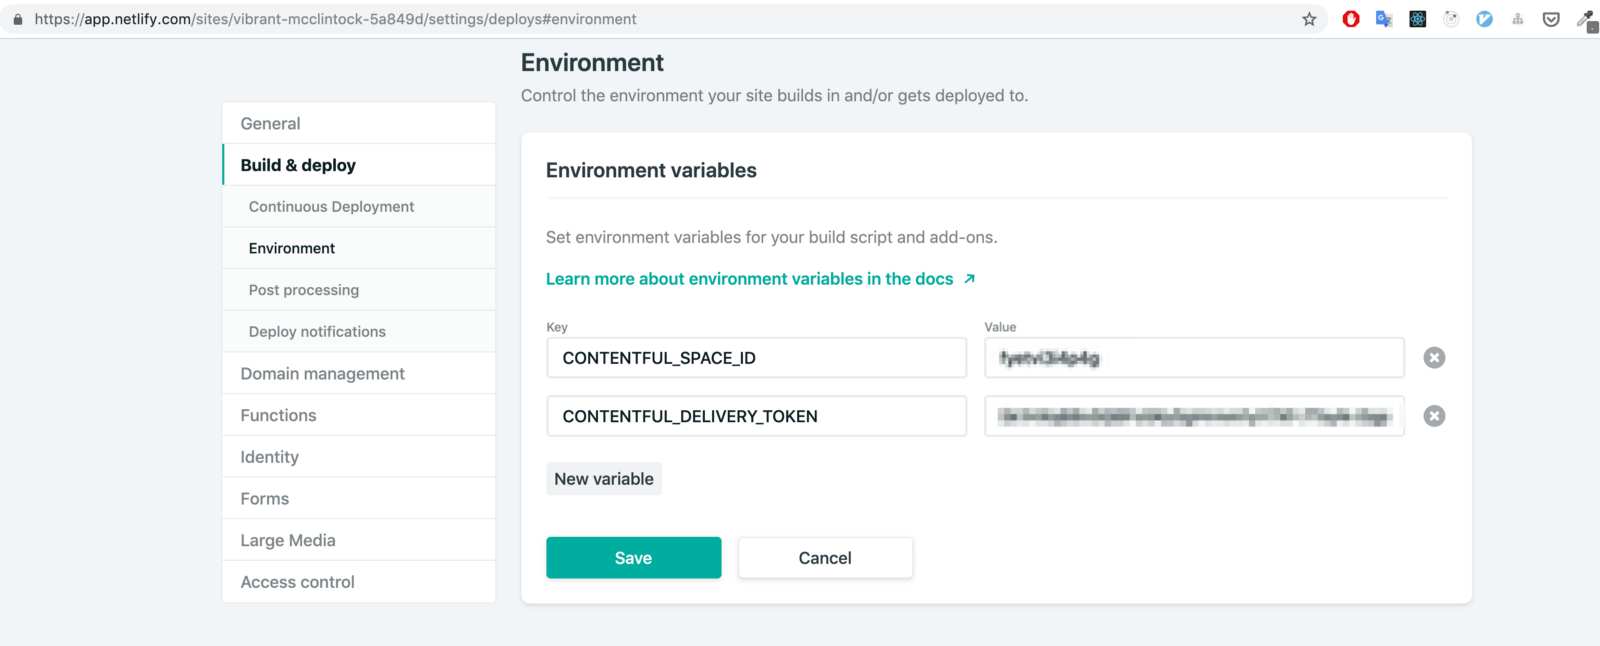
The values get from Contentful APIs we mentioned in the previous part. Save it and commit all our code. Waiting for Netlify deploy our blog in few minutes then check the result.
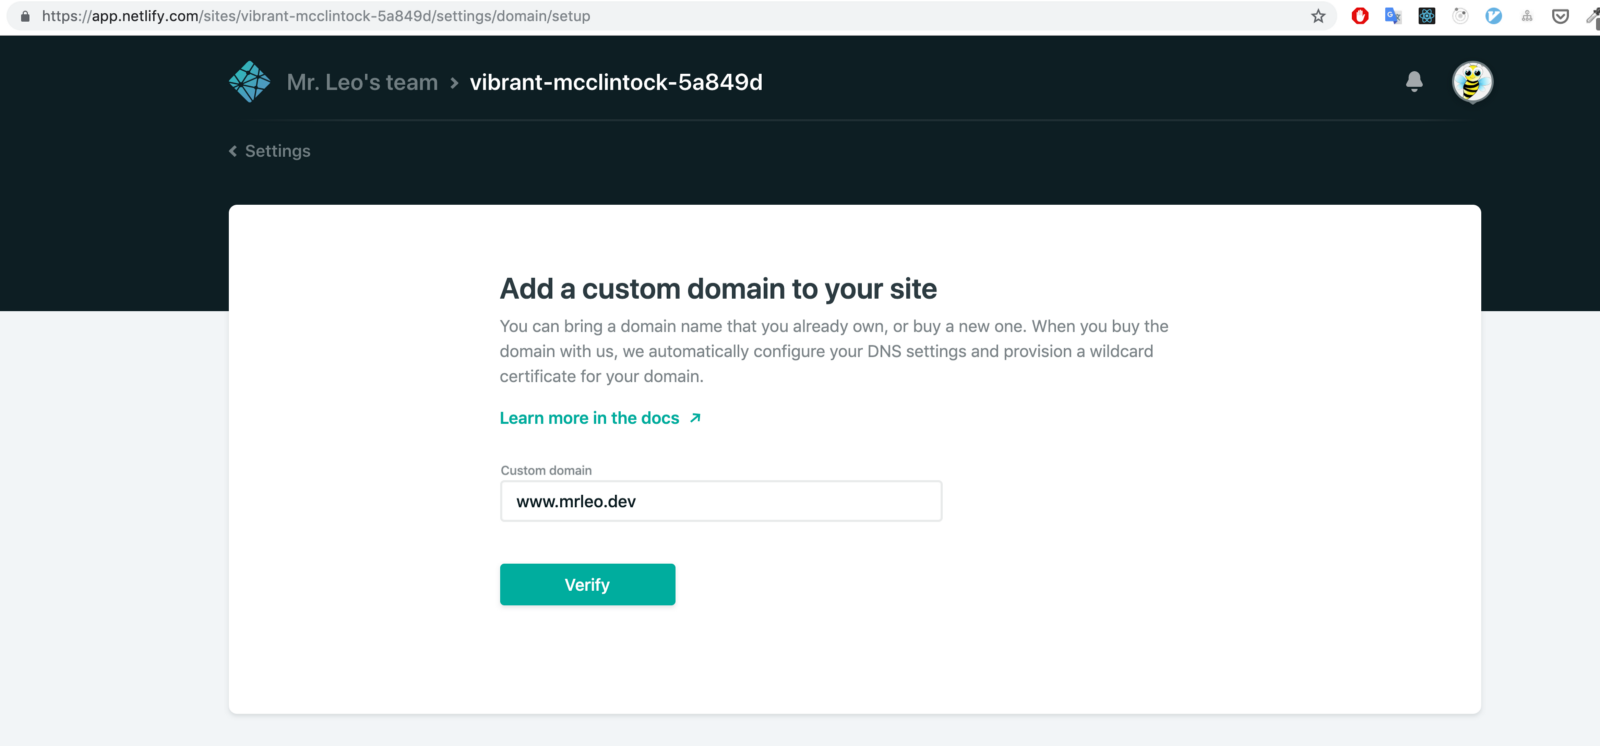
Instead using a random name domain generated by Netlify, we can add our custom domain.
Login to Netlify dashboard admin follow these steps: Select Settings -> Domain management -> Add custom domain

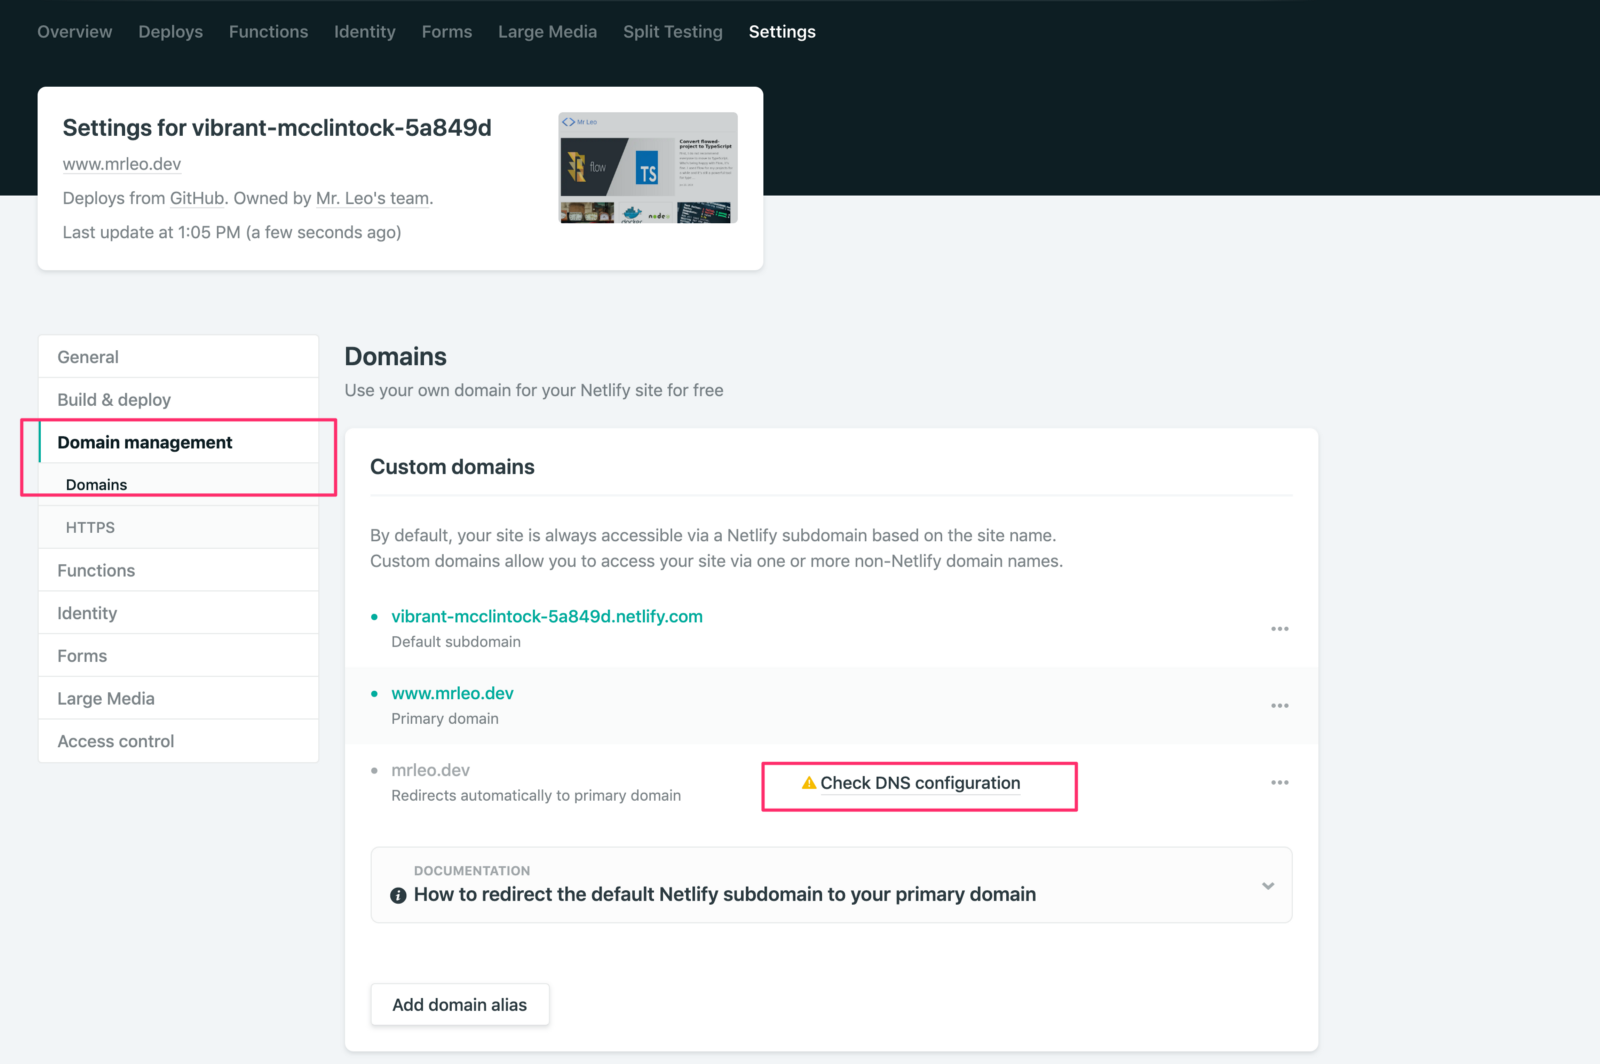
Enable DNS configuration
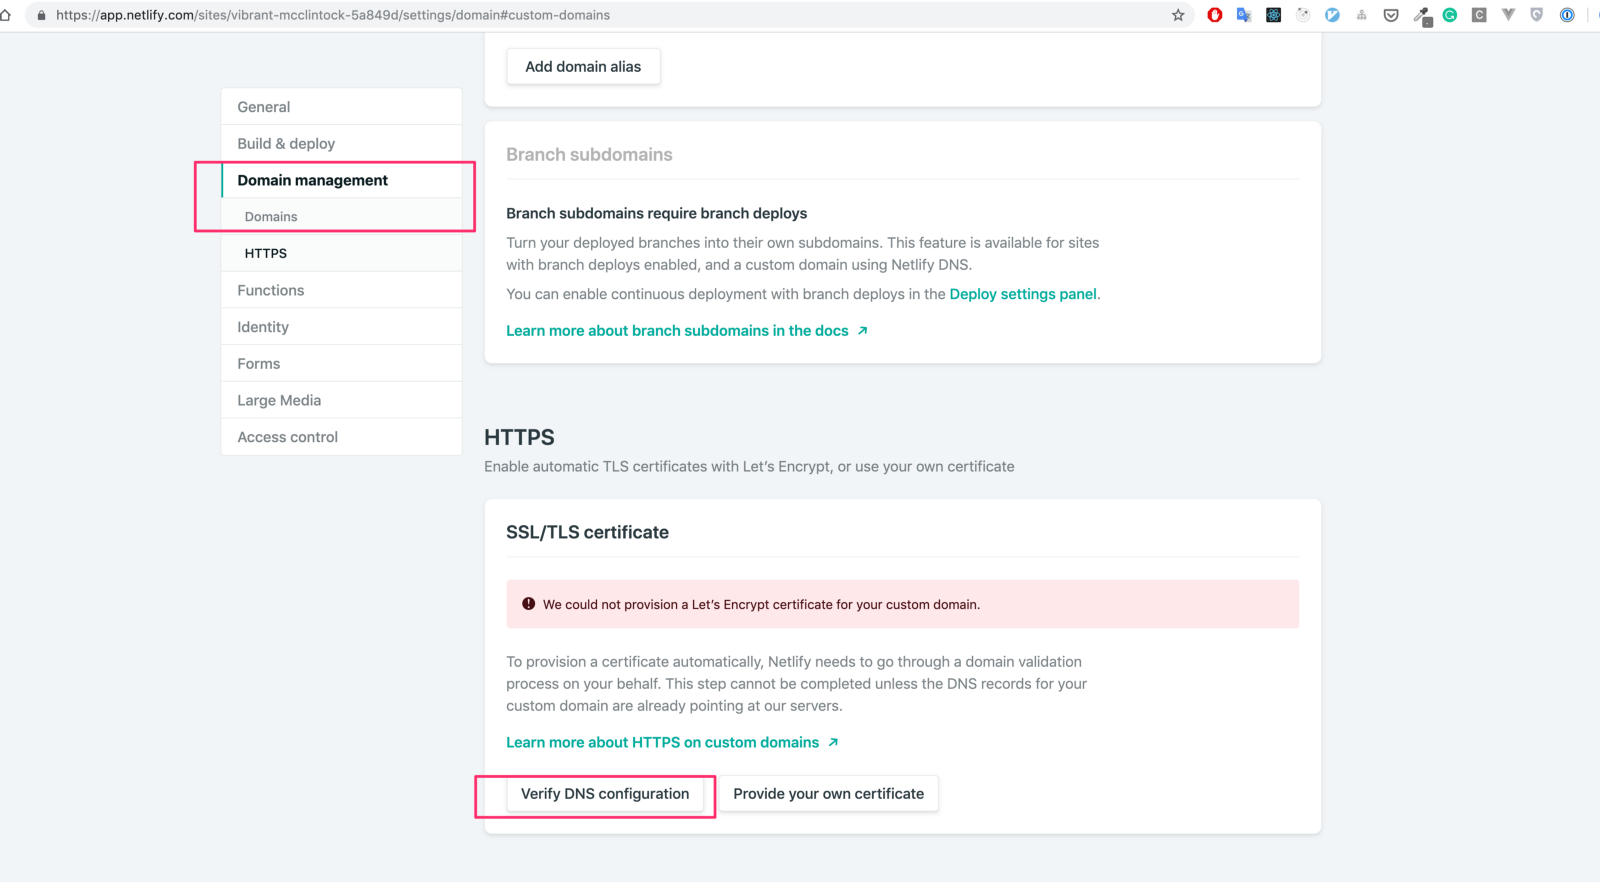
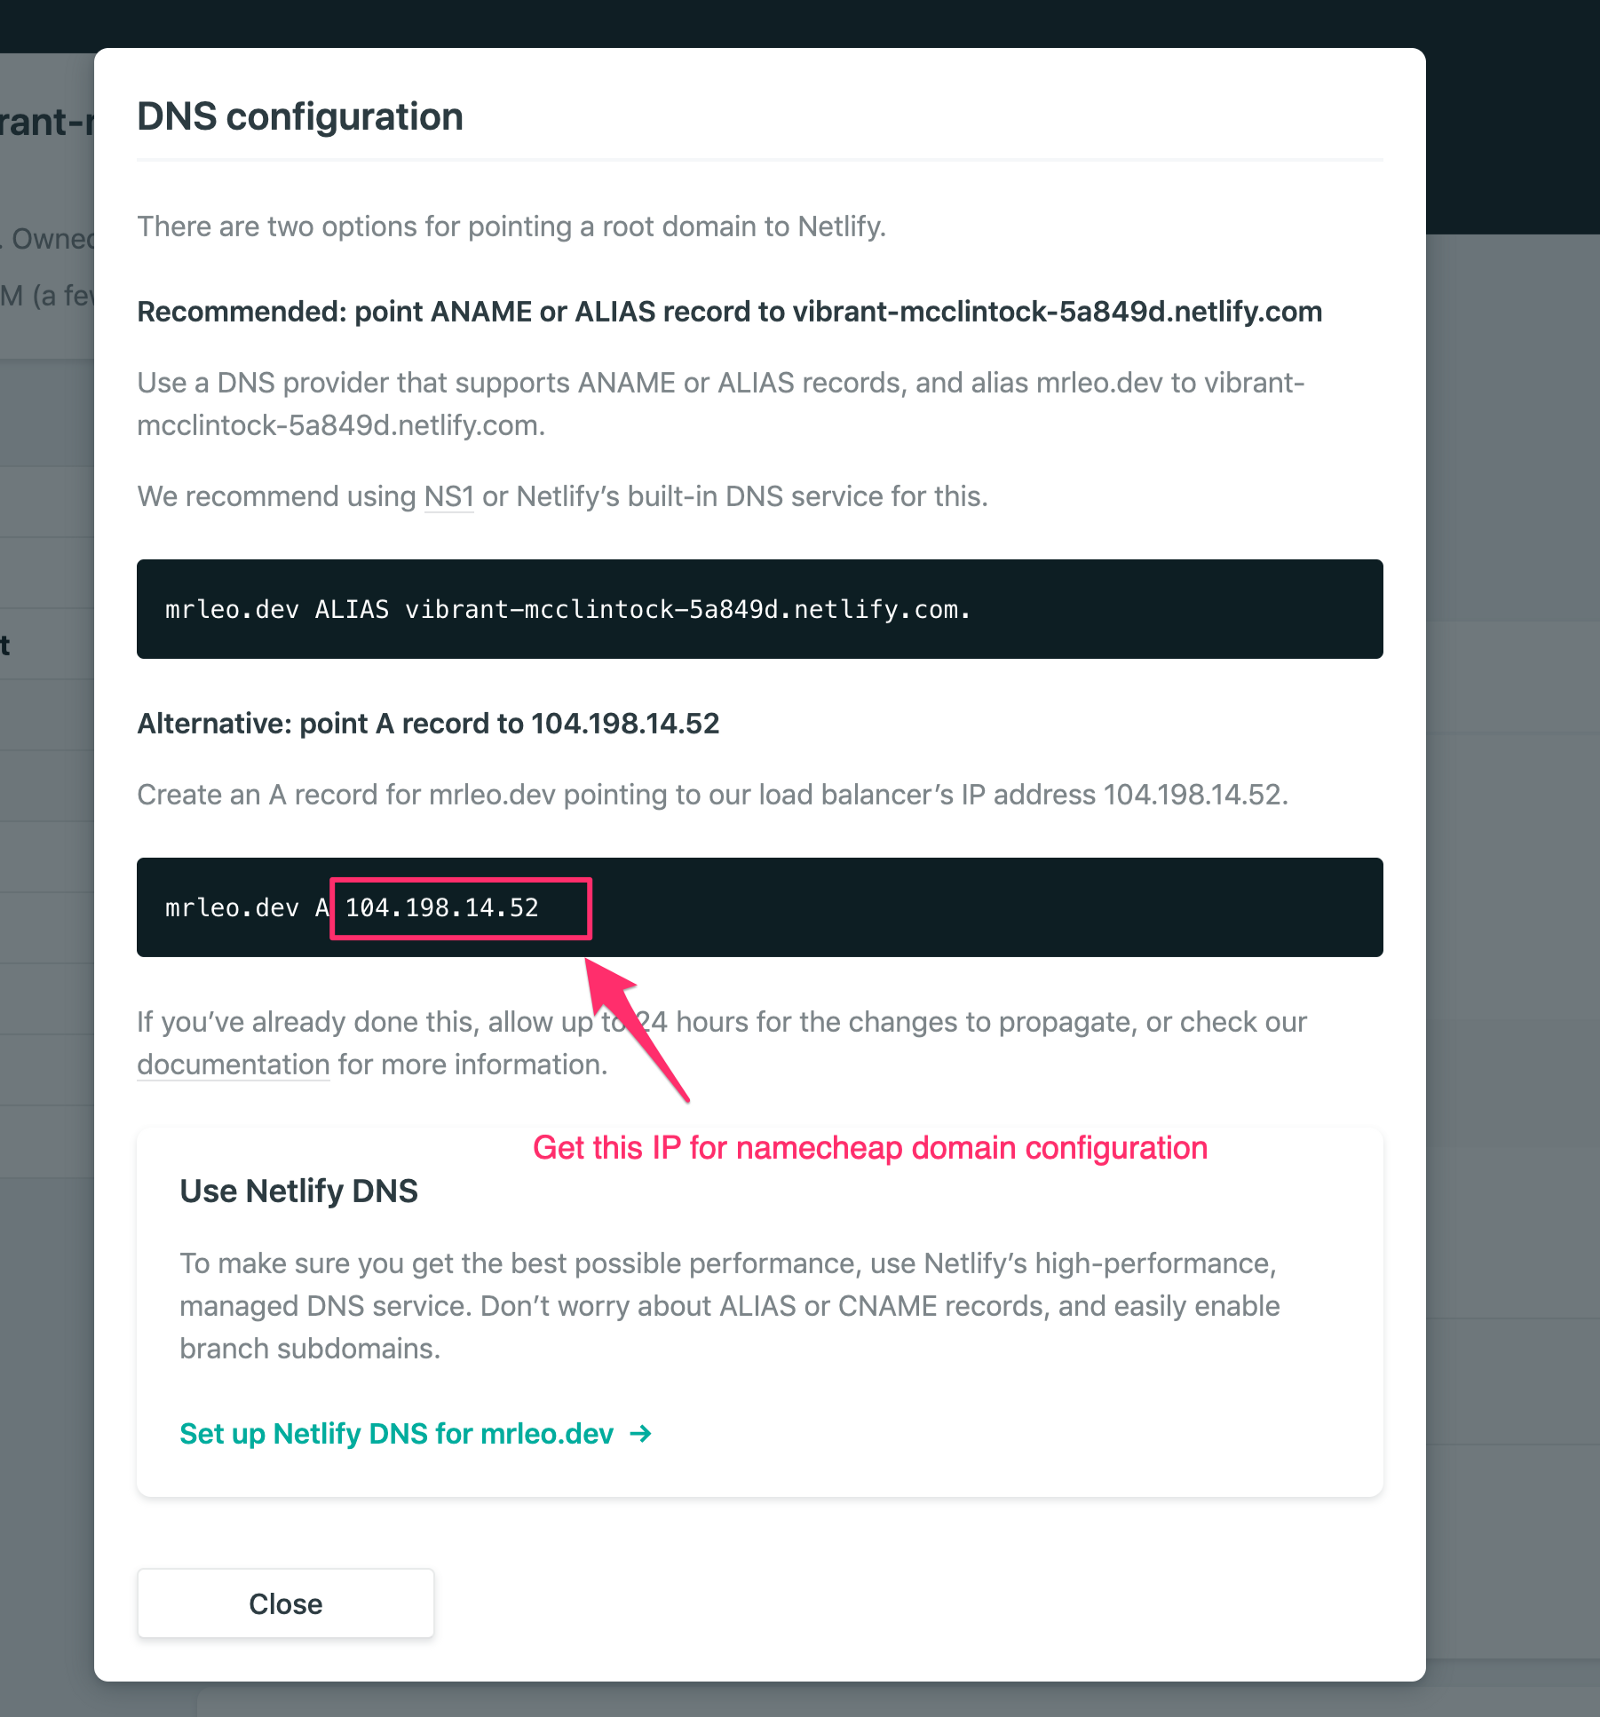
Check DNS configuration
Login to namecheap account. Select our domain in list then select Advance DNS menu:

Follow these configurations:
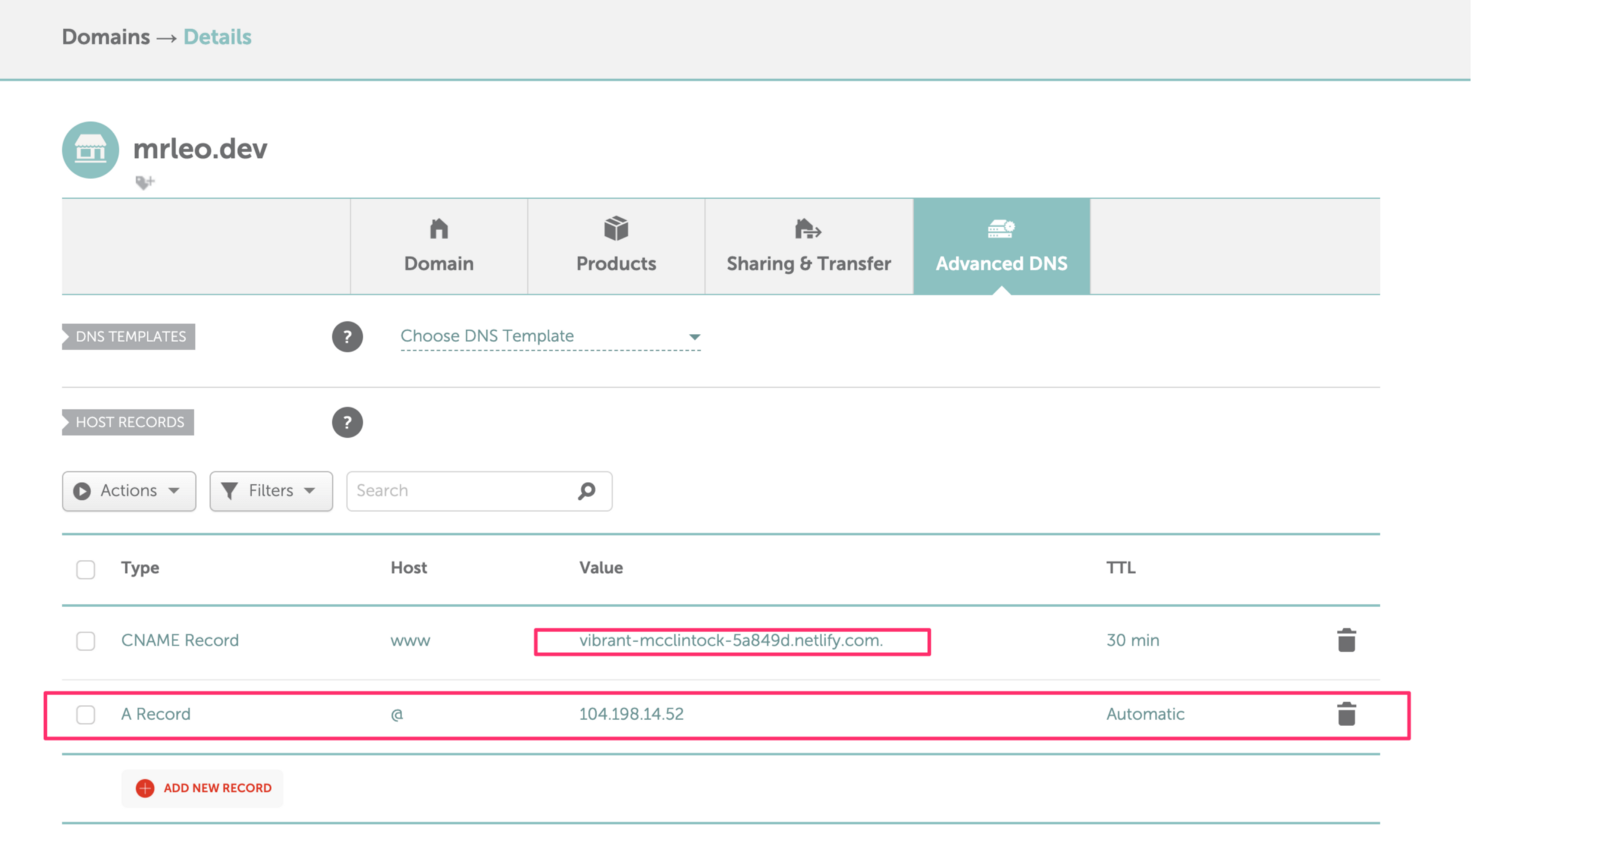
vibrant-mcclintock-5a849d.netlify.comA Record with host is @ and value is 104.198.14.52 (IP we obtained from Netlify above).Ok, this configuration will take us several minutes to apply. Time for a cup of coffee and waiting for our domain applied.
We have done a lot of work so far. At this moment, we can build own blog from scratch with powerful support from GatsbyJS framework.
In the future, we can add more advanced features for our blogs: comment, contact form, sidebar menu, etc.


