

Everything You Need to Know About Date in JavaScript
Jul 05, 2019

Our blog needs a backend to help manage data: content, tags, images, etc. We can build it manually from scratch: select backend framework, database, design database, implement backend logic, public APIs, find a server to host backend, etc. Honestly, it requires tons of work.
For anyone who doesn’t know about CMS headless before, it’s a service that helps you to build content and then return data through APIs. Gatsby works well with CMS headless as well. We can see several suggestions from their official website here: wordpress, prismic, drupal, contentful, netlify cms, etc.
We’ll try to use Contentful service. It’s free, easy to use and suitable for a personal blog.
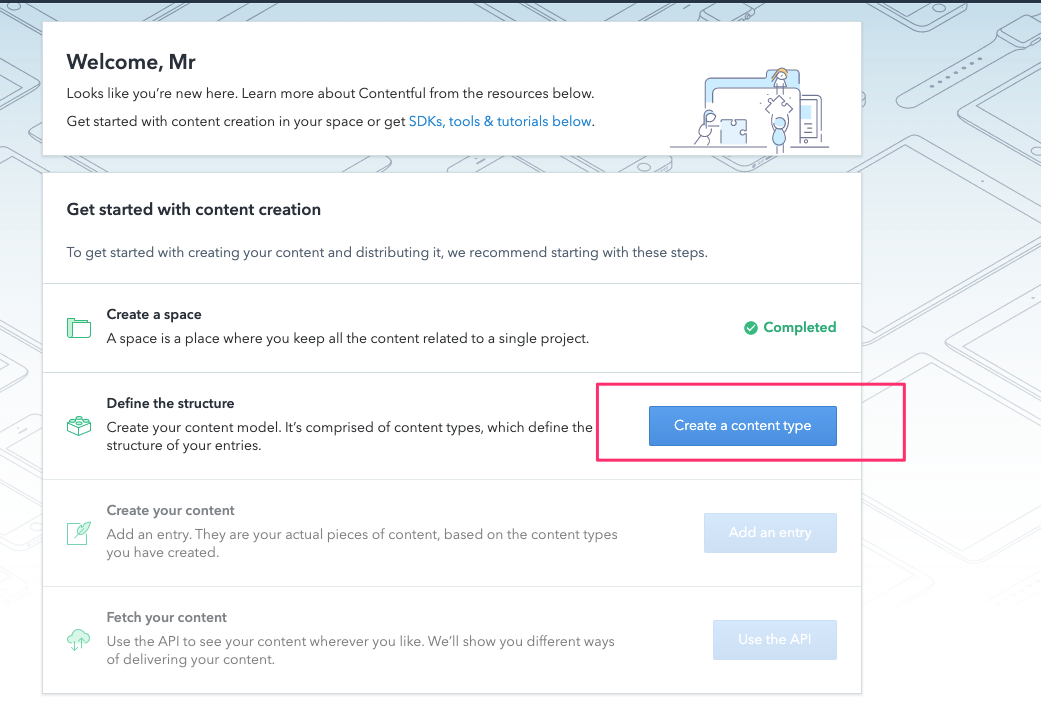
Contentful will create an example Space after creating new account. A Space looks like a workspace or a database for one website/blog. Free version will support maximum of 2 Spaces.
We’ll create a new empty Space name mr-leo-dev instead the default one.

If Space is quite the same as a database, Content Type looks like a table in our database.
Next step is create one content type and define fields for it:

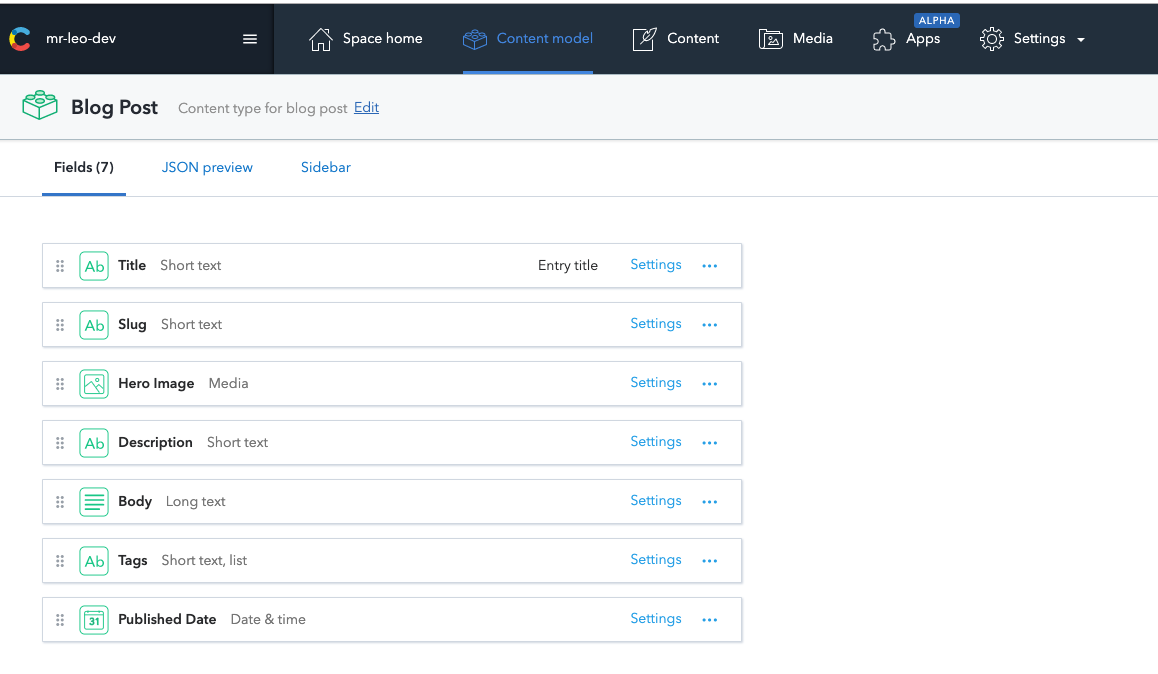
So what are fields that blog post should have?
We’ll create those fields for blog post content type in order:
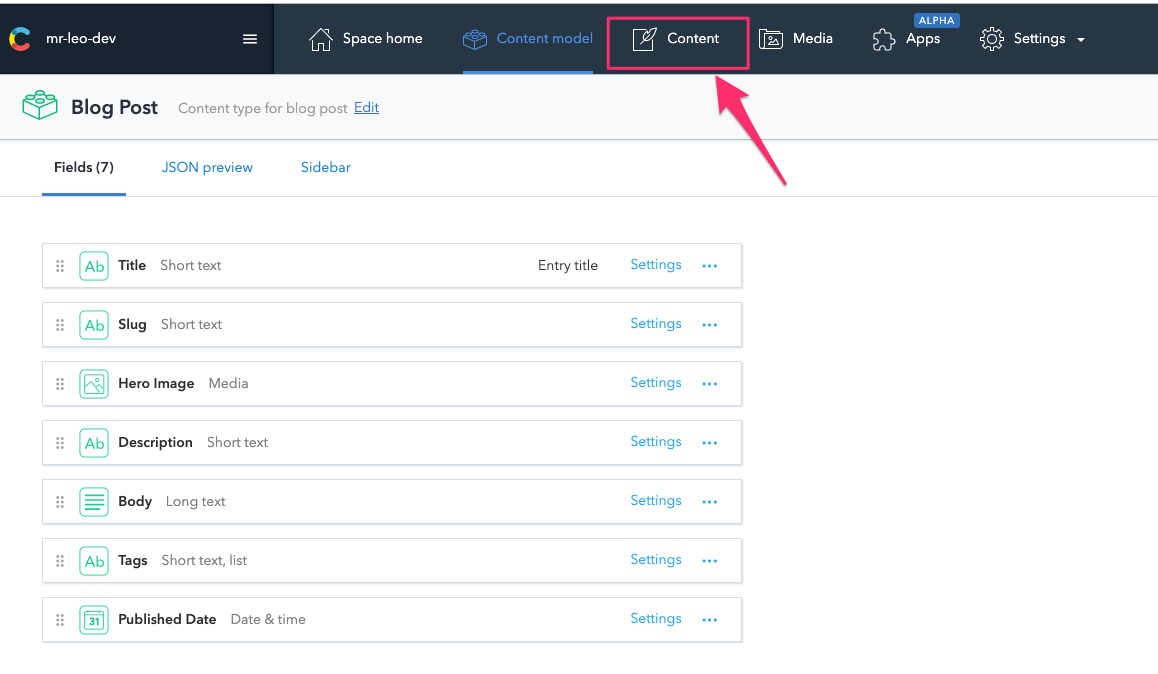
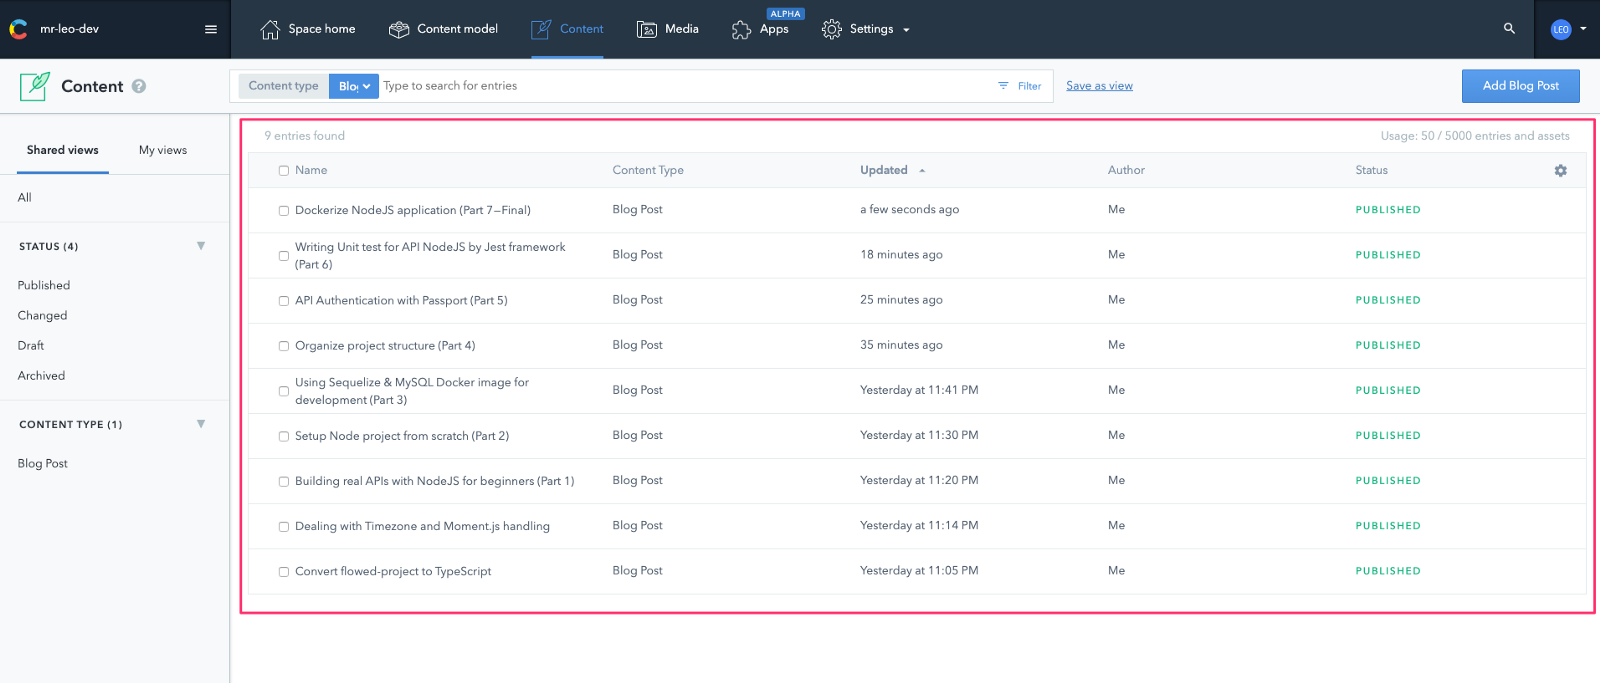
So we have Space as database, Content Type as table, now we create data (Content) for our blog:
Feel free to add any content you want to blog. Here I’ll move some posts from my Medium to Contentful’s content.
Contentful allows generating API key so that our Gatsby project can connect to its framework to fetch data.
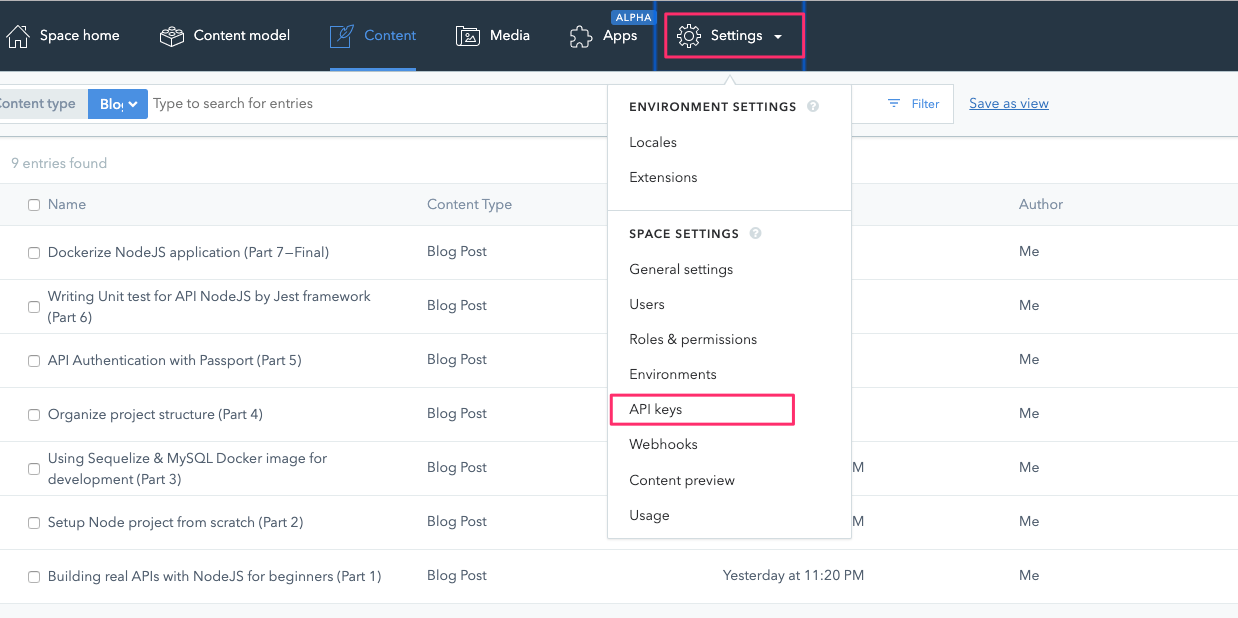

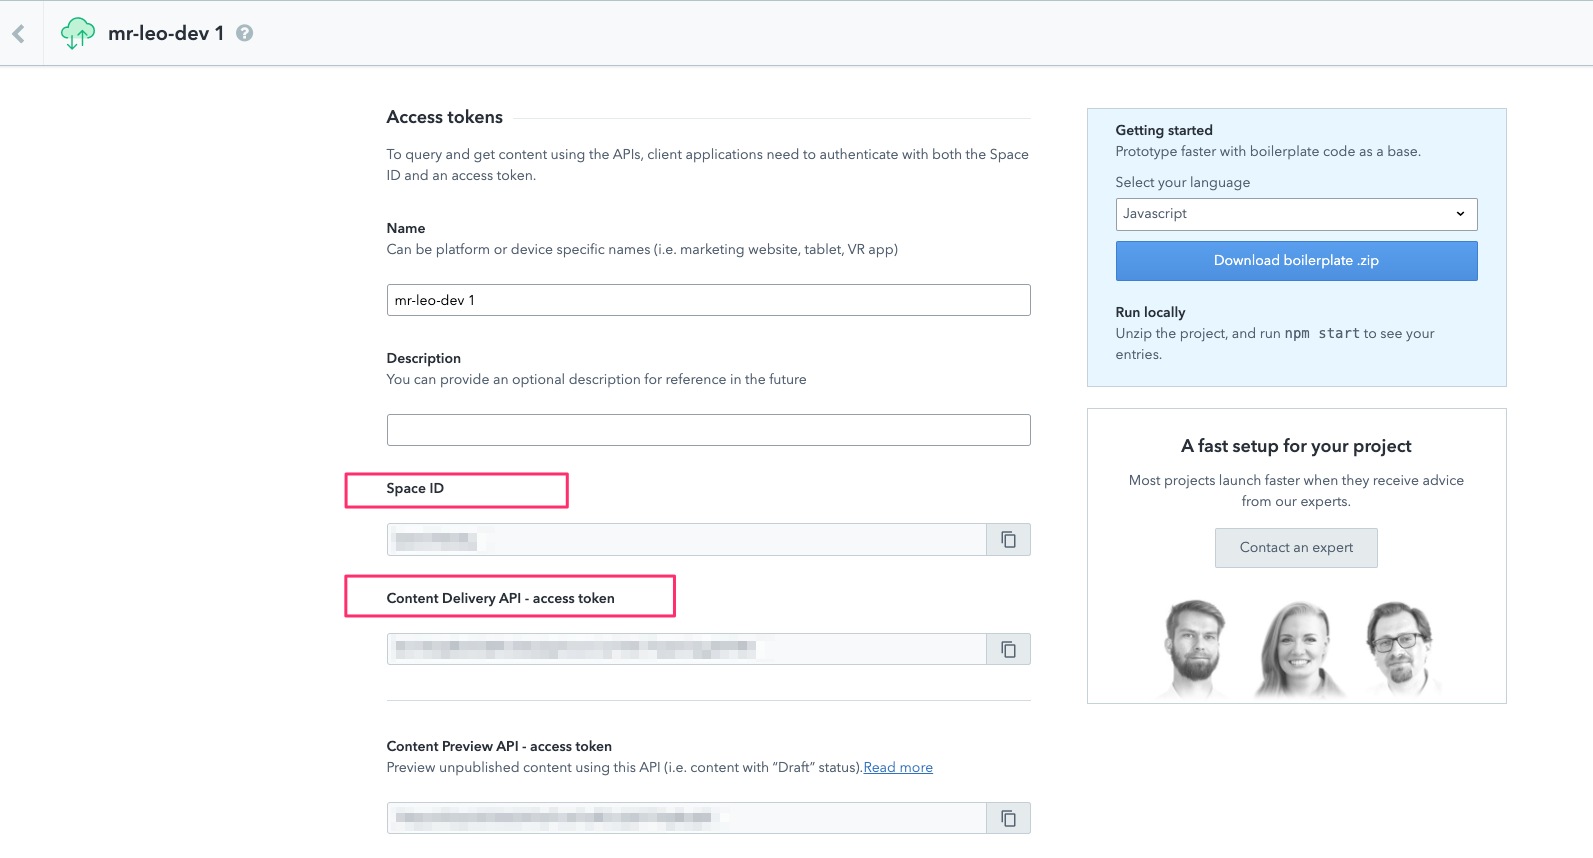
We’ll use Space ID and Content Delivery API — access token later.
The idea is Gatsby will connect to Contentful service to fetch all data we need. Then we can use GraphQL query to select suitable data to display on our blog.
Is a plugin for pulling content types, entries, and assets into Gatsby from Contentful spaces. It creates links between entry types and asset so they can be queried in Gatsby by using GraphQL.
yarn add gatsby-source-contentfulAt root folder, we’ll create a .contentful.json to store our Contentful APIs we created above. And remember to add this file to .gitignore because we don’t want to public sensitive information:
{
  "spaceId": "<OUR_SPACE_ID>",
  "accessToken": "<OUR_ACCESS_TOKEN>"
}Next step is to configure Contentful in gatsby-config.js:
let contentfulConfig

try {
  // Load the Contentful config from the .contentful.json
  contentfulConfig = require('./.contentful')
} catch (_) { }

// Overwrite the Contentful config with environment variables if they exist
contentfulConfig = {
  spaceId: process.env.CONTENTFUL_SPACE_ID || contentfulConfig.spaceId,
  accessToken: process.env.CONTENTFUL_DELIVERY_TOKEN || contentfulConfig.accessToken,
}

const { spaceId, accessToken } = contentfulConfig

if (!spaceId || !accessToken) {
  throw new Error(
    'Contentful spaceId and the delivery token need to be provided.'
  )
}

module.exports = {
  plugins: [
    // previous configurations
    {
      resolve: `gatsby-source-contentful`,
      options: contentfulConfig,
    },
  ],
}
We load spaceId and accessToken from local with development environment. For production, we’ll load them as environment variables. I’ll show you how to configure that environment on Netlify later.
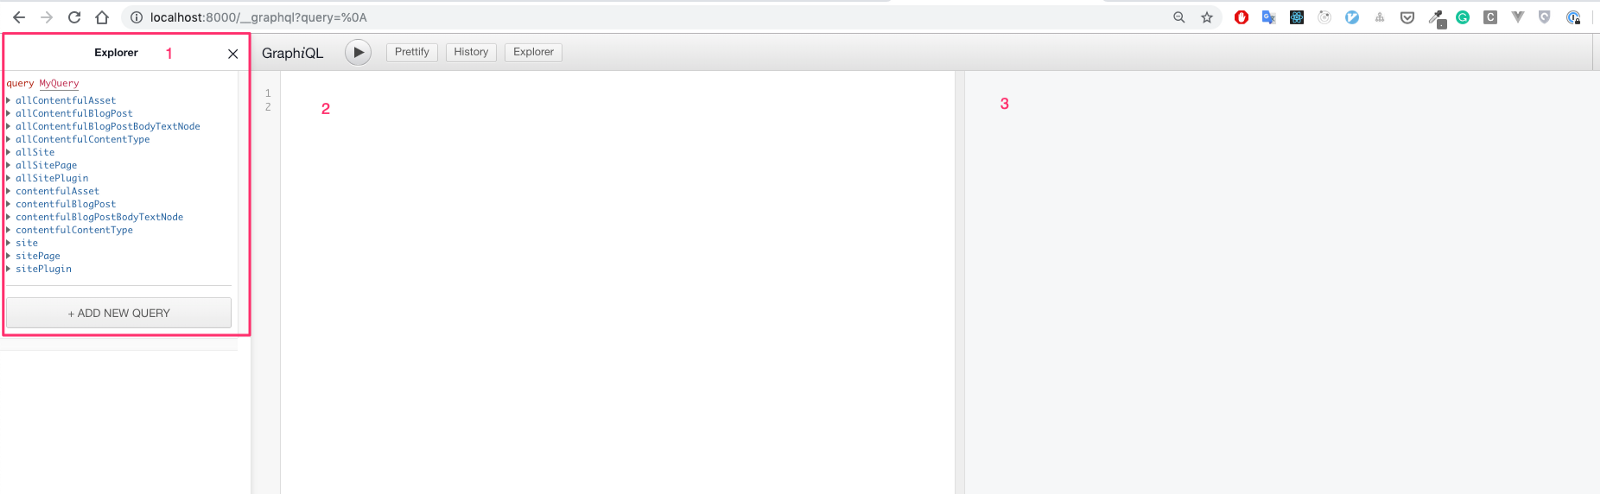
Now try to restart Gatsby server to apply new configuration. In order to playground GraphQL, Gatsby allows us to access http://localhost:8000/__graphql try to query some data first, before implementing to our code base.
The first advice would be to always use the GraphiQL page while developing. It gives you an idea on how to use the query results on your components.
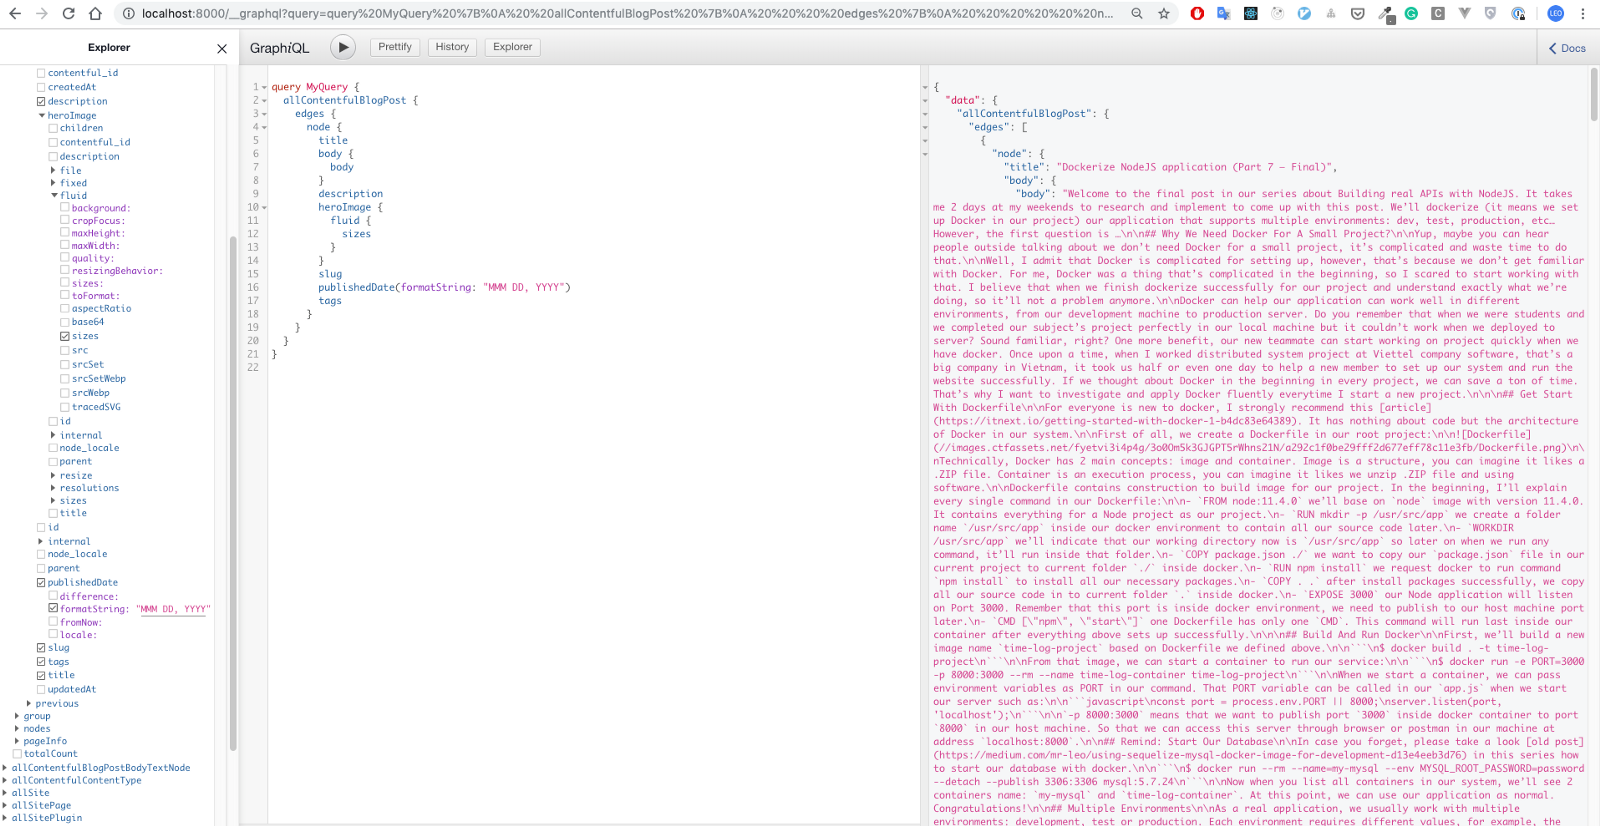
For example:
Time to integrate real data to our home page. We’ll need to adapt home page code a little bit. Using graphql supported by Gatsby in order to query data:
export const pageQuery = graphql`
  query HomePageQuery {
    allPosts: allContentfulBlogPost(
      sort: { fields: [publishedDate], order: DESC }
    ) {
      edges {
        node {
          title
          description
          heroImage {
            sizes(maxWidth: 663, maxHeight: 338, resizingBehavior: SCALE) {
             ...GatsbyContentfulSizes_withWebp
            }
          }
          slug
          publishedDate(formatString: "MMM DD, YYYY")
          tags
        }
      }
    }
  }
`
This query is used to query all contentul’s blog post order by publishedDate descendant.
Note: remember to export our pageQuery variable. Otherwise, Gatsby can’t understand to fetch data and inject to our component.
Gatsby supports us strongly when handling optimized images without work.
Is a React component specially designed to work seamlessly with Gatsby’s GraphQL queries. It combines Gatsby’s native image processing capabilities with advanced image loading techniques to easily and completely optimize image loading for your sites. I strongly recommend to their official documentation to understand more about this plugin and how well it is.
Install
yarn add gatsby-imageInstead of hardcoding for FeaturedPost component, now we’ll adjust it a little bit:
import React from 'react'
import styled from 'styled-components'
import { Link } from 'gatsby'
import Image from 'gatsby-image'

interface IProps {
  title: string
  slug: string
  publishedDate: string
  description: string
  heroImage: {
    sizes: {
      aspectRatio: number,
      src: string,
      srcSet: string,
      sizes: string,
    }
  }
}

const StyledContainer = styled.div`
  // nothing changed here
`

const FeaturedPost = (props: IProps) => {
  const {
    slug,
    heroImage,
    title,
    description,
    publishedDate,
  } = props

  return (
    <StyledContainer>
      <Link to={`/${slug}`}>
        <article>
          <div className="thumb">
            <Image sizes={heroImage.sizes} alt="" />
          </div>
          <div className="content">
            <h2>{title}</h2>
            <p className="description">{description}</p>
            <div className="info">{publishedDate}</div>
          </div>
        </article>
      </Link>
    </StyledContainer>
  )
}

export default FeaturedPostImage from gastby-image instead of img html tag.heroImage interface typescript.Similar to FeaturedPost component, we’ll change ThumbnailPost component to support Image as well:
import React from 'react'
import styled from 'styled-components'
import { Link } from 'gatsby'
import Image from 'gatsby-image'

interface IProps {
  title: string
  slug: string
  publishedDate: string
  description: string
  heroImage: {
    sizes: {
      aspectRatio: number,
      src: string,
      srcSet: string,
      sizes: string,
    }
  }
}

const StyledContainer = styled.div`
  // nothing changed here
`

const ThumbnailPost = (props: IProps) => {
  const {
    slug,
    heroImage,
    title,
    description,
    publishedDate,
  } = props

  return (
    <StyledContainer>
      <article>
        <Link to={`/${slug}`}>
          <div className="thumb">
            <Image sizes={heroImage.sizes} alt="" />
          </div>
          <div className="content">
            <h2>{title}</h2>
            <p className="description">{description}</p>
            <div className="info">{publishedDate}</div>
          </div>
        </Link>
      </article>
    </StyledContainer>
  )
}

export default ThumbnailPost
Finally, our home page will become:
import React from 'react'
import styled from 'styled-components'
import { graphql } from 'gatsby'
import get from 'lodash/get'

import Layout from '@components/Layout'
import FeaturedPost from '@components/FeaturedPost'
import ThumbnailPost from '@components/ThumbnailPost'

interface IProps {
  location: ILocation
}

interface IPost {
  title: string
  slug: string
  publishedDate: string
  description: string
  heroImage: {
    sizes: {
      aspectRatio: number,
      src: string,
      srcSet: string,
      sizes: string,
    }
  }
}

const StyledContainer = styled.div`
  .featured-post-container {
    margin-bottom: ${props => props.theme.rhythm(1.25)};
  }

  .thumbnail-post-container {
    display: flex;
    flex-wrap: wrap;
  }

  @media only screen and (max-width: 767px) {
    .thumbnail-post-container {
      display: block;
    }
  }
`

class HomePage extends React.Component<IProps, {}> {
  render() {
    const posts = get(this, 'props.data.allPosts.edges').map((item: { node: IPost }) => item.node)
    const featuredPost = posts.shift()

    return (
      <Layout location={this.props.location}>
        <StyledContainer>
          <div className="featured-post-container">
            <FeaturedPost
              title={featuredPost.title}
              slug={featuredPost.slug}
              publishedDate={featuredPost.publishedDate}
              description={featuredPost.description}
              heroImage={featuredPost.heroImage}
            />
          </div>
          <div className="thumbnail-post-container">
            {posts.map((post: IPost) => (
              <ThumbnailPost
                key={post.slug}
                title={post.title}
                slug={post.slug}
                publishedDate={post.publishedDate}
                description={post.description}
                heroImage={post.heroImage}
              />
            ))}
          </div>
        </StyledContainer>
      </Layout>
    )
  }
}

export default HomePage

export const pageQuery = graphql`
  query HomePageQuery {
    allPosts: allContentfulBlogPost(
      sort: { fields: [publishedDate], order: DESC }
    ) {
      edges {
        node {
          title
          body {
            body
          }
          description
          heroImage {
            sizes(maxWidth: 663, maxHeight: 338, resizingBehavior: SCALE) {
             ...GatsbyContentfulSizes_withWebp
            }
          }
          slug
          publishedDate(formatString: "MMM DD, YYYY")
          tags
        }
      }
    }
  }
`
Note: I refactored a little bit about styling.
In that example, we’re using get method from lodash to query nested objects more quickly.
Install lodash:
yarn add lodash
yarn add @types/lodash
Looking good, let’s review our result now:

Perfect!!!
So far so good. We already know how to fetch data from an external source into Gatsby project. Using GraphQL to query data and display to our frontend. We can optimize image performance easily thank for Gastby strongly support.
In the next part, we’ll create blog details pages dynamically. See you there.


