

Everything You Need to Know About Date in JavaScript
Jul 05, 2019

At the moment, we have done many features for our blog. However, we still can’t view one post details. We’ll complete this feature in this part together. Let’s start!
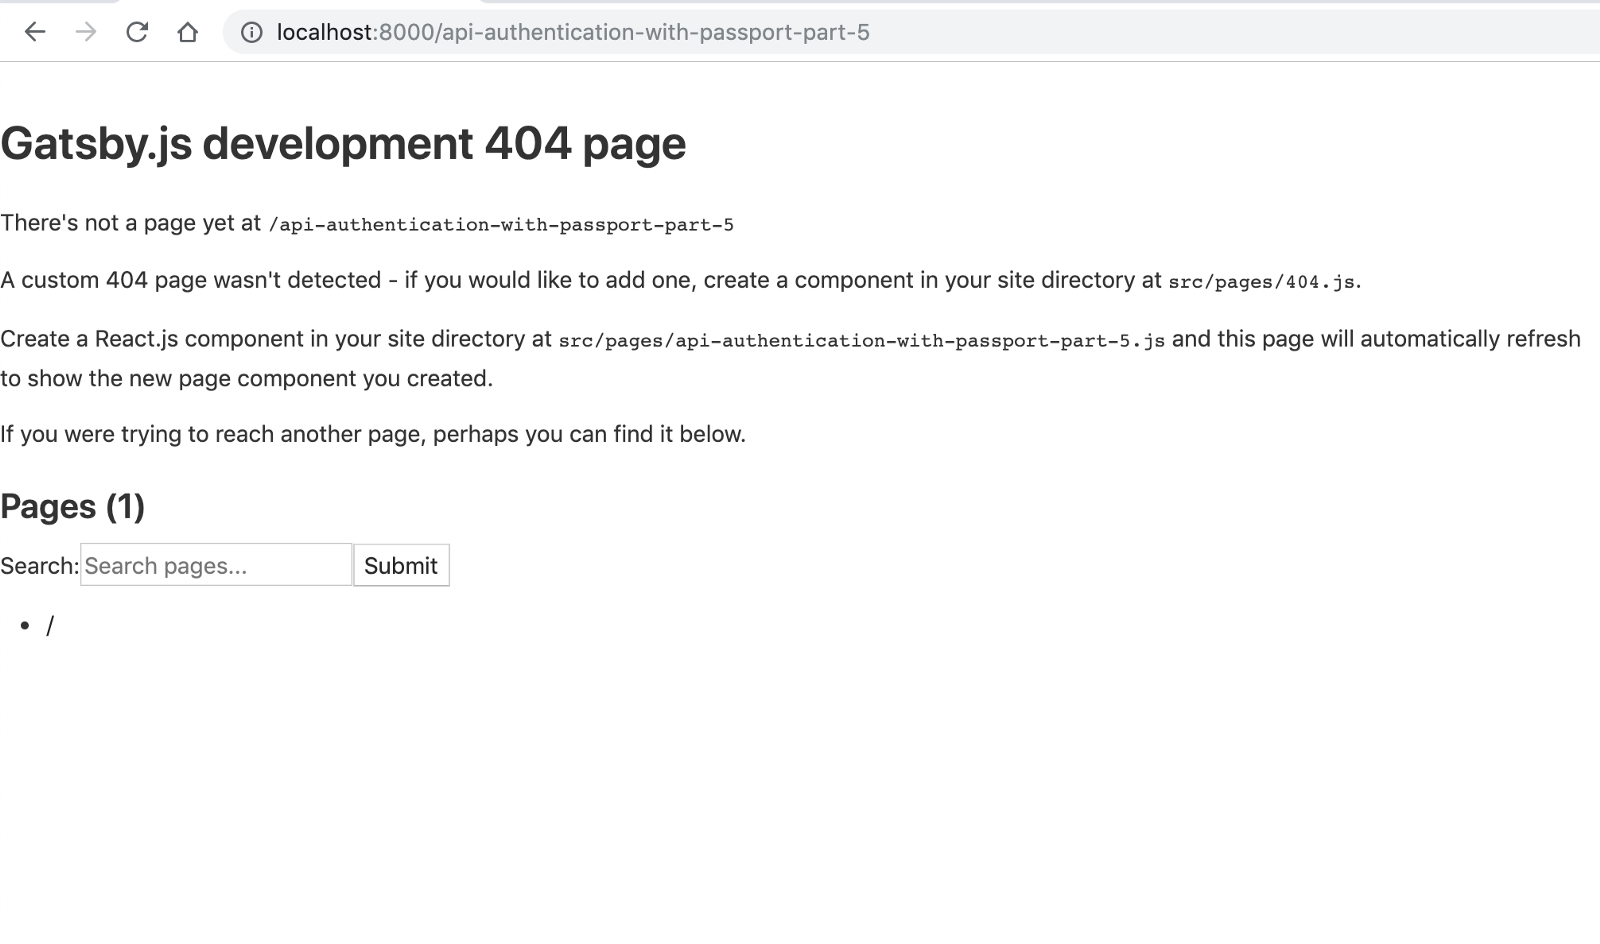
Based on our data from contentful, Gatsby support to create nodes (we can see them as blog details pages right now for easier understand) so that we can visit node’s details. Otherwise, whenever you click on any post, 404 page will be shown like this:
Create new page has 2 steps:
slug (or path) for the page.First, create gatsby-node.js file at root folder with the following content:
const path = require(`path`)

exports.createPages = ({ graphql, actions }) => {
  const { createPage } = actions
  const blogPost = path.resolve(`./src/templates/blog-post.tsx`)

  return graphql(
    `
      {
        allContentfulBlogPost {
          edges {
            node {
              title
              slug
            }
          }
        }
      }
    `
  ).then(result => {
    if (result.errors) throw result.errors

    // Create blog posts pages.
    const posts = result.data.allContentfulBlogPost.edges

    posts.forEach((post, index) => {
      createPage({
        path: post.node.slug,
        component: blogPost,
        context: {
          slug: post.node.slug,
        },
      })
    })

    return null
  })
}
Note that in order to create a page successfully, we need data (query from graphql) and a template page. In this example it is src/templates/blog-post.tsx. Another thing to notice here is that we create slug and inject into context of page. So that we can use it as one page’s property later:
...
context: {
  slug: post.node.slug,
}
...For the body of a blog, we need one plugin support for markdown syntax. gasby-transformere-remark here to help:
yarn add gatsby-transformer-remarkAdd one more configuration to gatsby-config.js:
// previous code

module.exports = {
  plugins: [
    // previous configurations
    {
      resolve: `gatsby-transformer-remark`,
      options: {
        plugins: [],
      },
    },
  ],
}
Moreover, gasby-transformere-remark is able to help to format code or handle image responsive by combining with other plugins such as: gatsby-remark-images-contentful, gatsby-remark-prismjs, gatsby-remark-smartypants, etc.
Let’s install and configure them together:
yarn add gatsby-remark-prismjs gatsby-remark-images-contentful gatsby-remark-smartypants prismjsUpdate gatsby-config.js:
// previous code

module.exports = {
  plugins: [
    // previous configurations
    {
      resolve: `gatsby-transformer-remark`,
      options: {
        plugins: [
          {
            resolve: `gatsby-remark-images-contentful`,
            options: {
              maxWidth: 1020,
              showCaptions: true,
            },
          },
          `gatsby-remark-prismjs`,
          `gatsby-remark-smartypants`,
        ],
      },
    },
  ],
}In order to format code style, we need to add prismjs css to gatsby-browser.js file first:
import "prismjs/themes/prism-solarizedlight.css"

// custom typefaces
import "typeface-montserrat"
import "typeface-merriweather"File src/templates/blog-post.tsx:
import React from 'react'
import { graphql } from 'gatsby'
import get from 'lodash/get'
import styled from 'styled-components'
import Image from 'gatsby-image'
import Layout from '@components/Layout'
interface IProps {
pageContext: {
slug: string
}
location: ILocation
data: {
postDetails: {
title: string
slug: string
publishedDate: string
description: string
heroImage: {
sizes: {
aspectRatio: number,
src: string,
srcSet: string,
sizes: string,
}
}
}
}
}
const StyledContainer = styled.div`
.header-container {
h1 {
margin-top: 0;
}
.published-date {
${props => ({ ...props.theme.scale(-0.5) })}
margin-top: ${props => props.theme.rhythm(-0.75)};
color: ${props => props.theme.colors.gray600};
}
}
.hero-image {
margin: ${props => props.theme.rhythm(1.25)} 0;
}
.body-container {
blockquote {
${props => ({ ...props.theme.scale(0.5) })}
border-left-color: ${props => props.theme.colors.primary};
}
img {
width: 100%;
}
}
`
class BlogPostTemplate extends React.Component<IProps, {}> {
render() {
const post = get(this.props, 'data.postDetails')
return (
<Layout location={this.props.location}>
<StyledContainer>
<div className="header-container">
<h1>{post.title}</h1>
<div className="published-date">
{post.publishedDate}
</div>
<div className="hero-image">
<Image sizes={post.heroImage.sizes} alt="" />
</div>
</div>
<div className="body-container"
dangerouslySetInnerHTML={{ __html: post.body.childMarkdownRemark.html }}
/>
</StyledContainer>
</Layout>
)
}
}
export default BlogPostTemplate
export const pageQuery = graphql`
query BlogPostBySlug($slug: String!) {
postDetails: contentfulBlogPost(slug: { eq: $slug }) {
title
description
heroImage {
sizes(maxWidth: 700, maxHeight: 349, resizingBehavior: SCALE) {
...GatsbyContentfulSizes_withWebp
}
}
slug
publishedDate(formatString: "MMM DD, YYYY")
tags
body {
childMarkdownRemark {
html
}
}
}
}
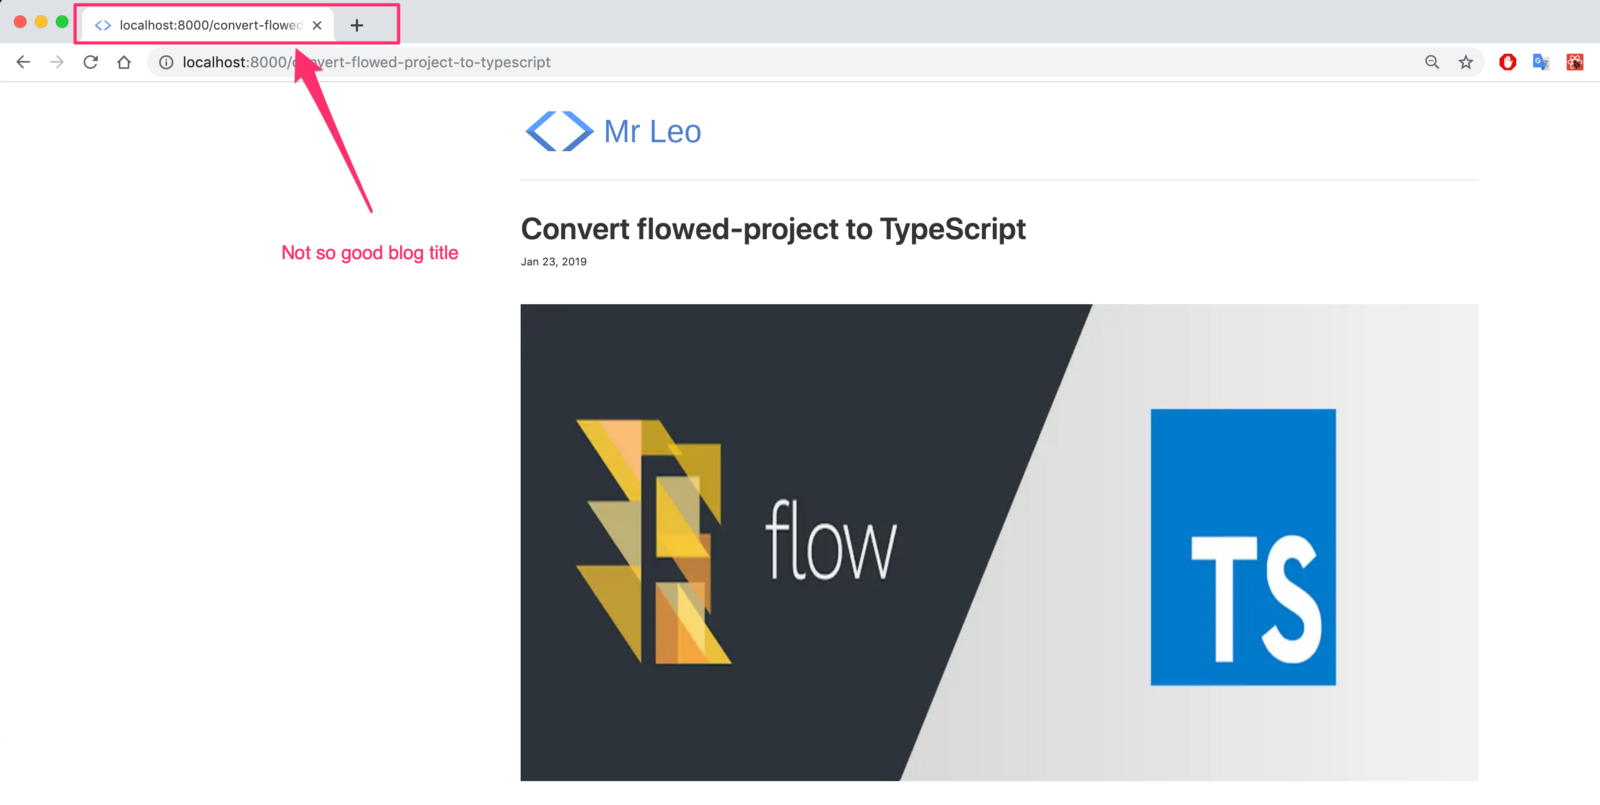
`Restart Gatsby server and take a look at our result:
Really cool, right? However, if you intend to the blog title on the browser tab, you’ll see that the name is not so good.
We’ll improve this one in next part and also adding some basic SEO component. See you there.


